Objective:
Learn how to create planes along a curve.
Applies to:
- Texturing
- Industrial design
Procedure:
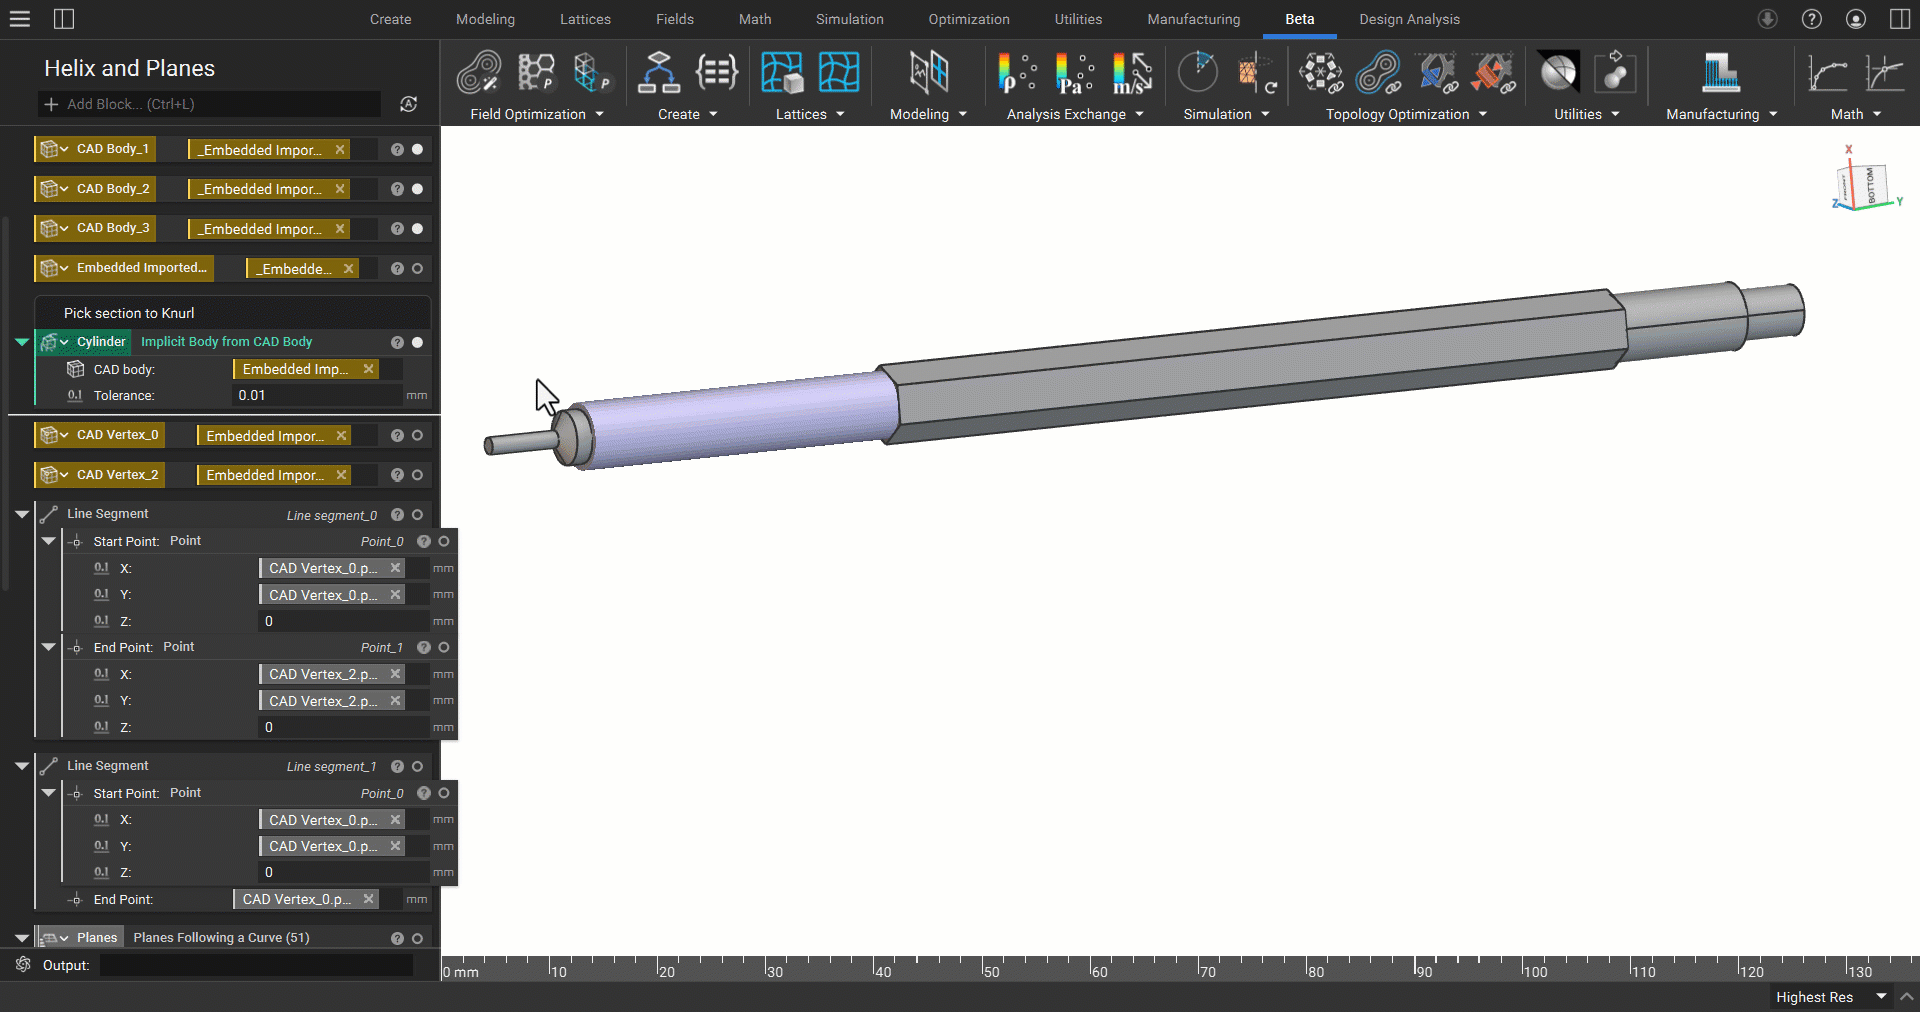
1. We start by importing our CAD parts (how to work with CAD bodies) using the Import Part block and converting them into Implicit Body using the Implicit Body from CAD Body block for the Normal direction.

2. In this workflow, we will use two custom blocks (How to open a Custom Block and How to create a Custom Block). Next, Download these blocks and import them into your workflow.
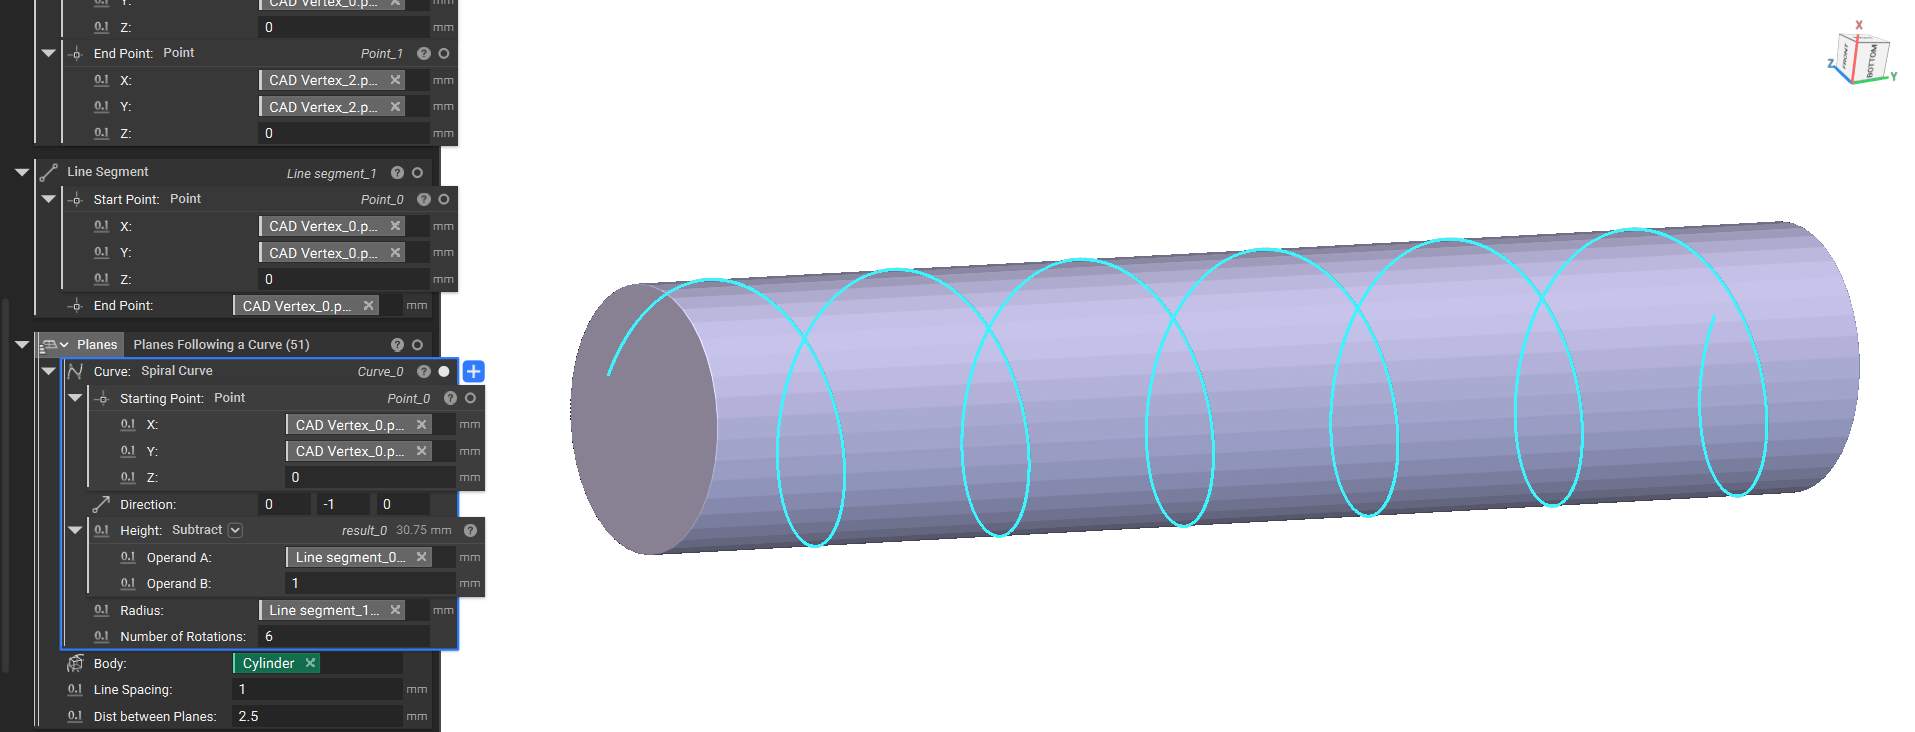
- Spiral Curve - This custom block creates a spiral curve based on the given inputs
- Planes Following a Curve - This custom block outputs planes spaced at the given distance apart. Its z-direction is normal to the surface, and its x-direction follows the provided curve.
3. We will use the CAD Vertex to identify the geometric locations and lengths to create the spiral curve. The Properties panel has the point conversion with x, y, and z parameters. We can then use a Line Segment block to calculate the distance/ length between the points.
4. We generate a Spiral Curve on the Implicit Body based on the parameters we calculated in the above step. We then use this as an input for the Planes Following a Curve block.
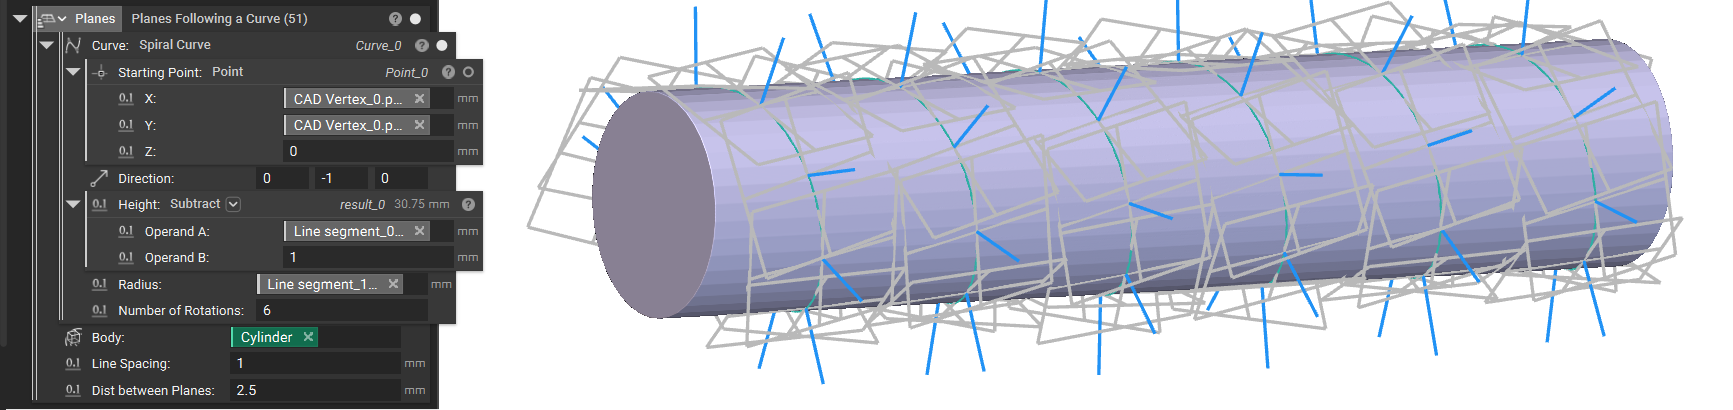
5. We will now use an Orient Body block to orient the implicit body we want to pattern along the curve with the planes.

And that’s it! You’ve successfully created a knurled surface texture.
Do you still need help? Contact the support team, and we’ll be happy to help!