Objective:
Learn what a list is and how to use them.
Procedure:
What is a list?
Creating Lists
List Errors
Lists in Lists
List Properties
Manipulating Lists
Auto-Populated Lists
Lists of One (1)
Groups
Filter
Sort
Concatenate Lists
Using Lists
What is a list and list processing?
All blocks in nTop can exist as singular entities or as a list. A list contains multiple items of the same type in a block, like a list of points. When a process runs on a list block, it runs the process on every list item. Working with list blocks is called List Processing.
Creating Lists
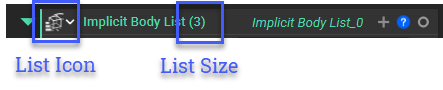
To create a list of any type, type ‘list’ into the search bar, along with the block type you would like to create. Lists are denoted in nTop by three small rectangles of increasing width in the bottom left corner of the data type icon. The list size is shown in parentheses next to the Block type. Not all lists are created from the search bar; some are made unintentionally or automatically with certain blocks. Some blocks turn a singular entity into a list, and some merge lists together.
List Errors
1. Invalid list item at index:
Issue: Your list has an error at the index indicated. Using a list as an input into another Block can lead to errors if the values used in the list are incorrect.
Applies to: Any block that can accept a list type as input.
Common examples include: Using an invalid item in an Implicit Body List, then using it as a Body input for a Mesh from Implicit Body. This results in errors when using the Mesh from Implicit Body as an input into other Blocks.
Cause: The values used in a list item are incorrect, causing a block to fail when it builds. Using a list as an input into another Block can lead to errors if the values used in the list are incorrect.
Solution: In the error message, note the index number of the list item causing the error. Use the index to identify the list item causing the error. All nTop lists begin at index 0.
2. Input list length mismatch.
Issue: When two lists of different lengths are input into a block. The block can’t run because it tries to match the two lists together.
Applies to: Any block that accepts two or more list inputs
Cause: Lengths of lists are not equal.
Unintentional lists of (1) are used with another list input. Open up the input block’s properties to check if it is a list type. It will have (#) in the block name.
Solution: Ensure that the list length of both operands is the same. If you do have an unintentional list of (1), open up the block properties and drag out the chip that has [0] in the name (typically beneath all other properties). Drag this into the Notebook or directly into another block input.
Lists in Lists - Inputting a list block within another list block
A list block can't be input into another list block.
However, if you want to input a list into a block that doesn't accept lists, you can create a Custom Block to run the list instead. This works because the inputs of a notebook are contained in variables, and variables cannot process lists. However, once it's being used as a Custom Block, it's a block like any other and, therefore, can process lists. This is not equivalent to putting the list into the input but rather running the Custom Block workflow multiple times, once for each element.
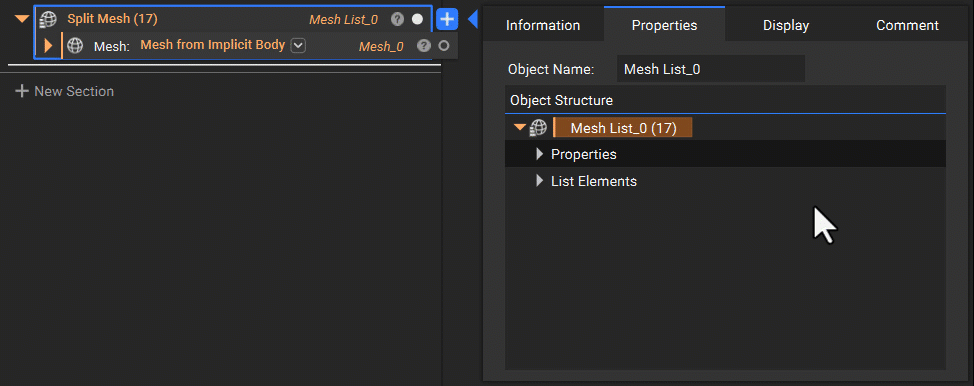
List Properties
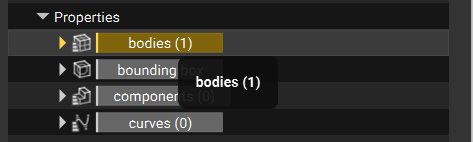
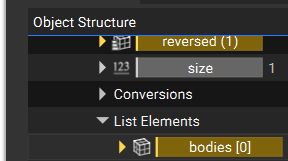
List block properties contain a set of Properties at the top under the Properties chevron and individual properties for each item under the List Elements chevron. The individual properties can be dragged from a List to create an individual item. The arrow next to the individual entities can be expanded to reveal more information on each individual list entity. You can click and drag the individual chips into the notebook to create a new single variable separated from the list.
Manipulating Lists
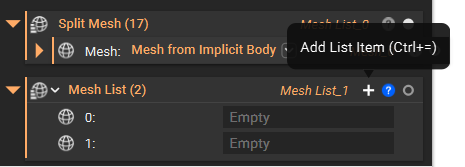
There are two methods to add blocks to a list:
1. Drag a new block into a List block. Remember that all entities in a list must have the same block type (i.e., they must have the same icon in the top left corner of the block).
2. Select the '+' next to the View Block Details icon to add more inputs. If you add too many, use the '-' on the left of the input to remove them.
The order of list entities can be changed by dragging list entities around within the List block.
Other list manipulation tools are in the Utilities Ribbon Tab, under ‘General’. These blocks are outlined below.
- List Element: Extract a single entity from a list based on its index number.
- Insert: Combine two lists into one by inserting a list into another at a specified index location.
- Sub List: Extract a smaller list from a larger input list based on a starting index and the desired size of the sub-list.
- Remove: Remove one or more entities from a list based on a starting index and the number of removed entities.
Auto-Populated Lists
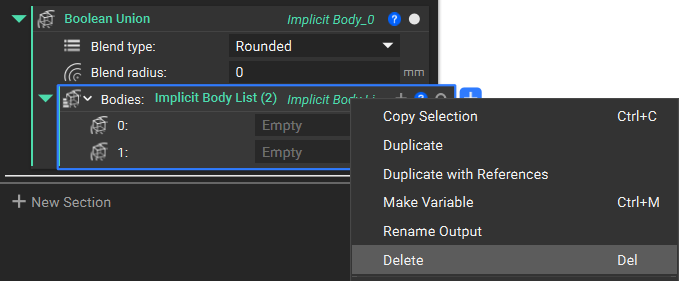
Some blocks use list inputs and combine them into a singular entity. An example is the Boolean Union block, which takes in a list of bodies and generates a single unioned body. Blocks like this are auto-populated with an empty list, which is useful for quickly dragging bodies inside to complete the operation.
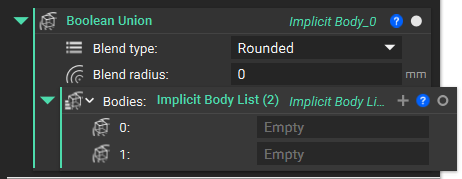
Sometimes, a user already has a list prepared that they would like to perform a boolean union operation on. In this case, the auto-populated list must be deleted and replaced by the desired list.
Lists of One (1)
You may encounter a situation where you try to add your parts to a block that accepts a list of inputs, and it won't let you.
This is because the input you are trying to add looks like "Block Name (1)". Somewhere, a List of One was created. Lists of one are sometimes unintentionally created by the user or during CAD/Part importing. They can be converted to singular entities by dragging the entity out of the List Elements section of the Properties tab in the Block Details or by using the List Element block.
One common error when using Lists of One is solved using the instructions in this article (The simulation results window isn't appearing).
To drag the entity out, open the Properties tab, expand until you find the part, and drag the part chip into the Notebook. This creates a block in the Notebook that doesn't have a list. You can also drag the chip out directly into an input.
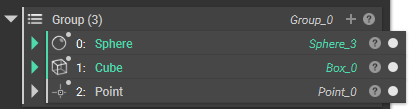
Groups
Groups in nTop are the same as lists, except they can contain a combination of block types. For example, the group below consists of a point, a sphere, and a cube. The same list manipulation operations described can be performed on groups.
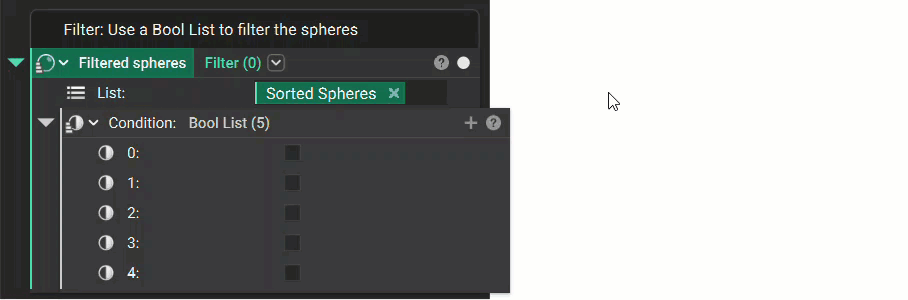
Filter
The Filter block removes items from a list based on a Bool List, which must be the same length as the List input. The default state of the Filter block takes in a Bool list, which is a series of checkboxes, where items in the list can be kept or removed from the input lists by toggling the checkboxes.
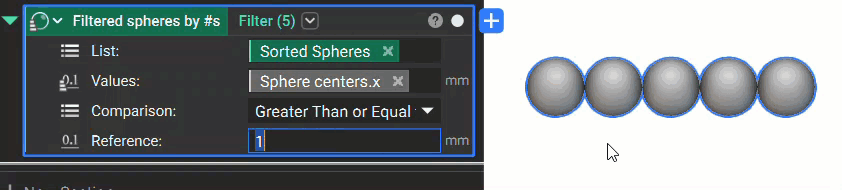
The overload of the Filter block allows a list to be filtered by a scalar list of the same length. The example below shows how the Spheres are filtered based on their X coordinate value.
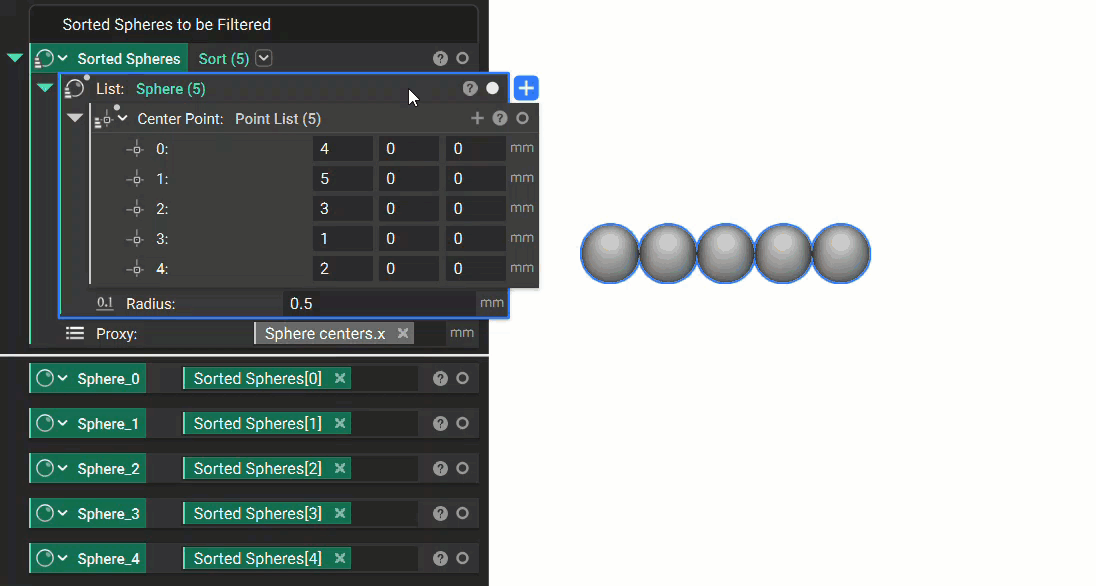
Sort
The Sort block will rearrange a list from the lowest to the highest value. If you would like the values sorted from highest to lowest, you can use the ‘reversed’ scalar list in the block’s properties. The example below shows how a list of random numbers in random order, are sorted from lowest to highest using the Sort block.
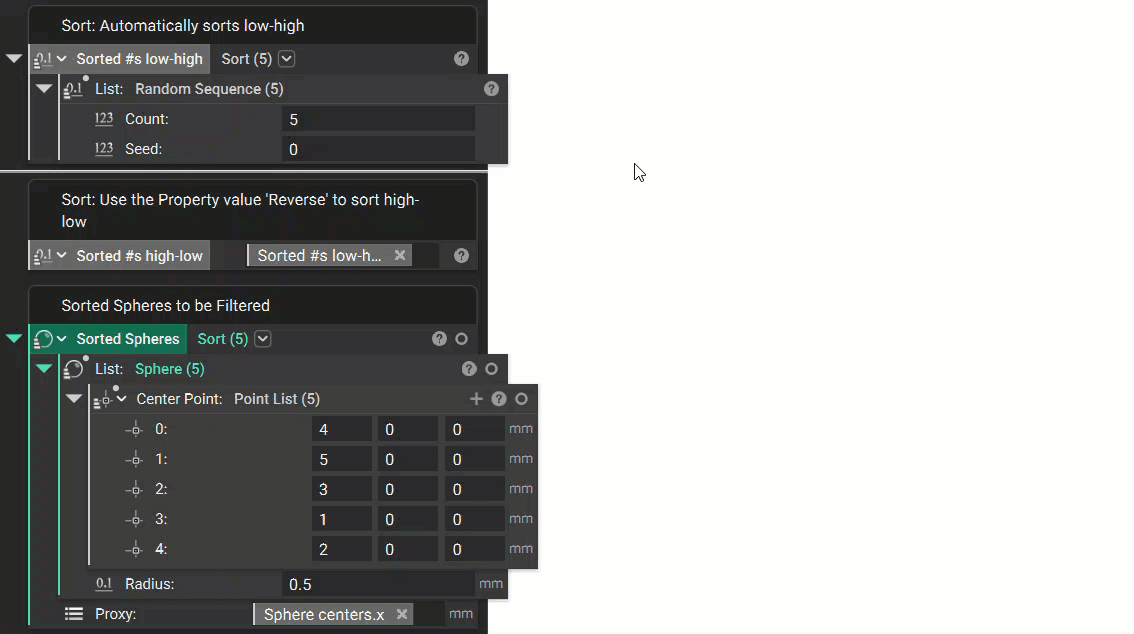
The overload of the Sort block sorts a list based on a scalar list. In the example below, a list of spheres in random order are sorted based on their X coordinate value.
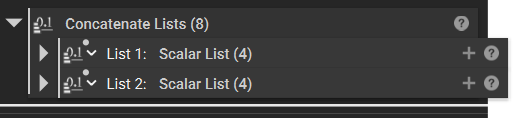
Concatenate Lists
Multiple lists can be added together using the Concatenate Lists block. In order to do this, the Lists must be of the same type.
Using Lists
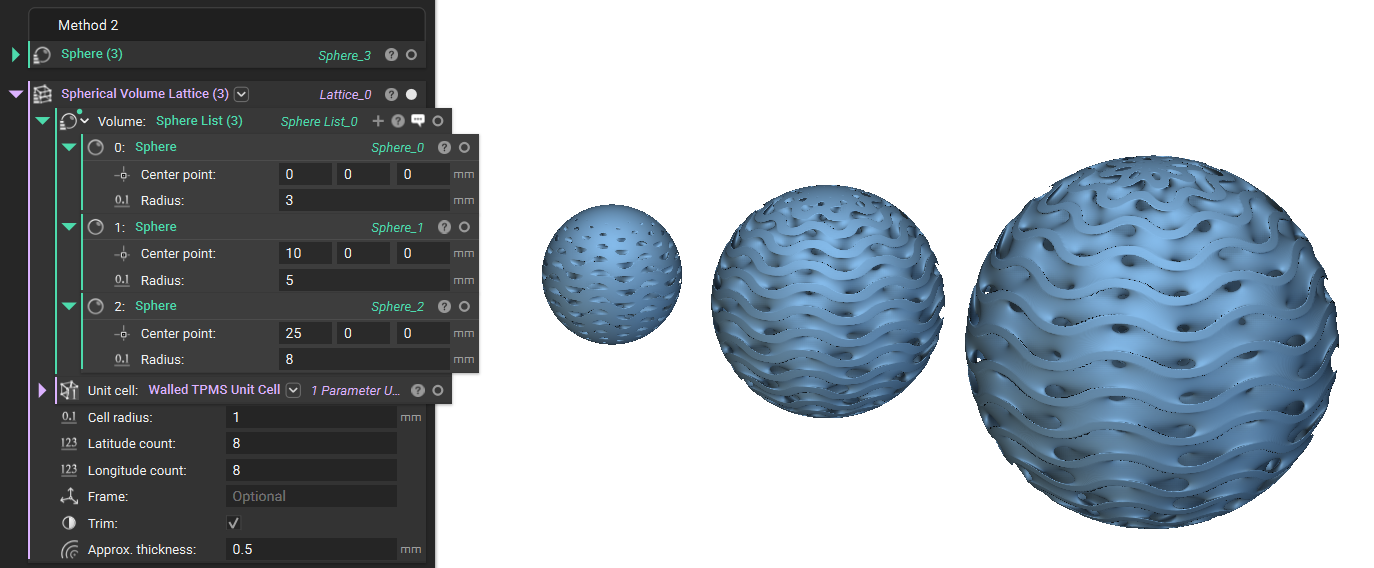
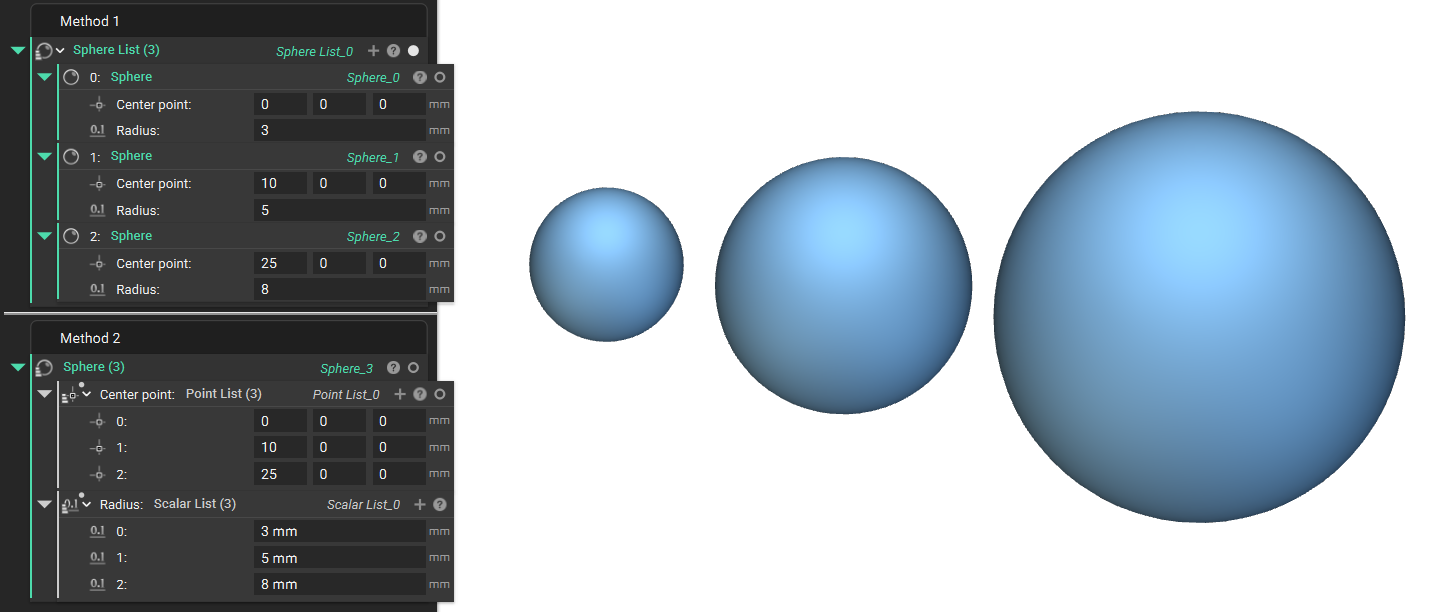
1. Add a Sphere List (notice the list icon on top of the sphere icon).
2. Add a Sphere block into each input of the Sphere List. Change the x-value center point of each sphere to 0, 10, and 25, respectively. Then change the radius to 3, 5, and 8 mm.
3. Add a Spherical Volume Lattice block, a Walled TPMS Unit Cell, and enter Approx. thickness of 0.5mm. Now insert the Sphere List into the Body input. This runs the operation on each object in the list.