Overview
A user is assigned the role of Org. Admin. that enables the ability to invite people from within their company to use nTop and manage their licenses. The Org. Admin. is a role assigned to an individual by nTop. This guide walks you through how to use the Organization Dashboard, accessible at app.ntop.com/org.
Table of Content
1. What does Org. Admin role offer?
2. Manage Users
3. Manage Teams
4. Manage Licenses
5. Miscellaneous Features
1. What does Org. Admin role offer?
With the Org. Admin. role, you can:
- Add/Edit/Delete Users
- Add/Edit/Delete Teams
- Manage Licenses
If you become an Org. Admin, you’ll receive an email invitation to create your account at app.ntop.com. Once your password is set, you can perform the actions outlined above. If you already have an account at app.ntop.com, you’ll still receive an email notifying you of this role change with links to helpful onboarding material, such as this support article.
The Organization Dashboard is integrated into your user dashboard. It’ll appear as another menu option, Organization, below the Home tab.
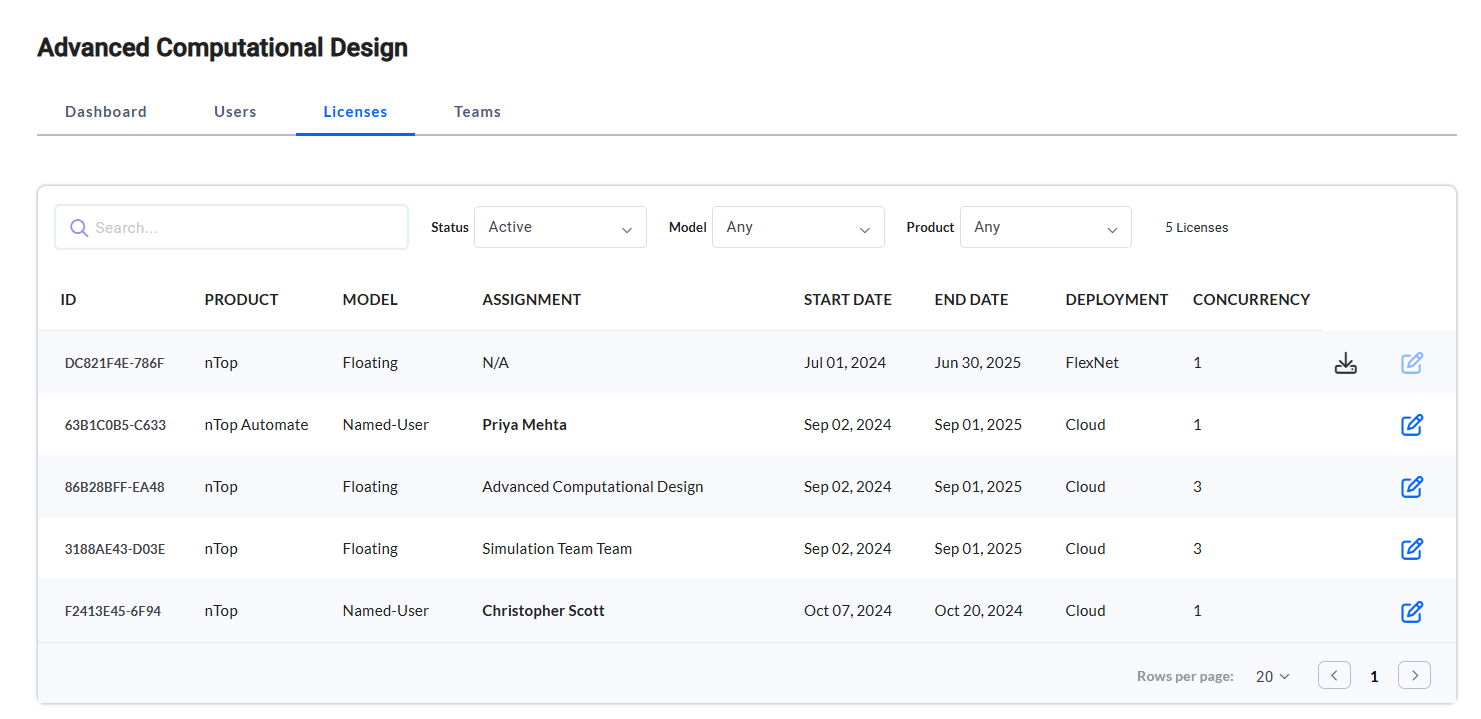
You’ll see an overview of your entire organization from the Dashboard menu. This includes the number of Teams, Users, and Licenses. Below is an example of this view:
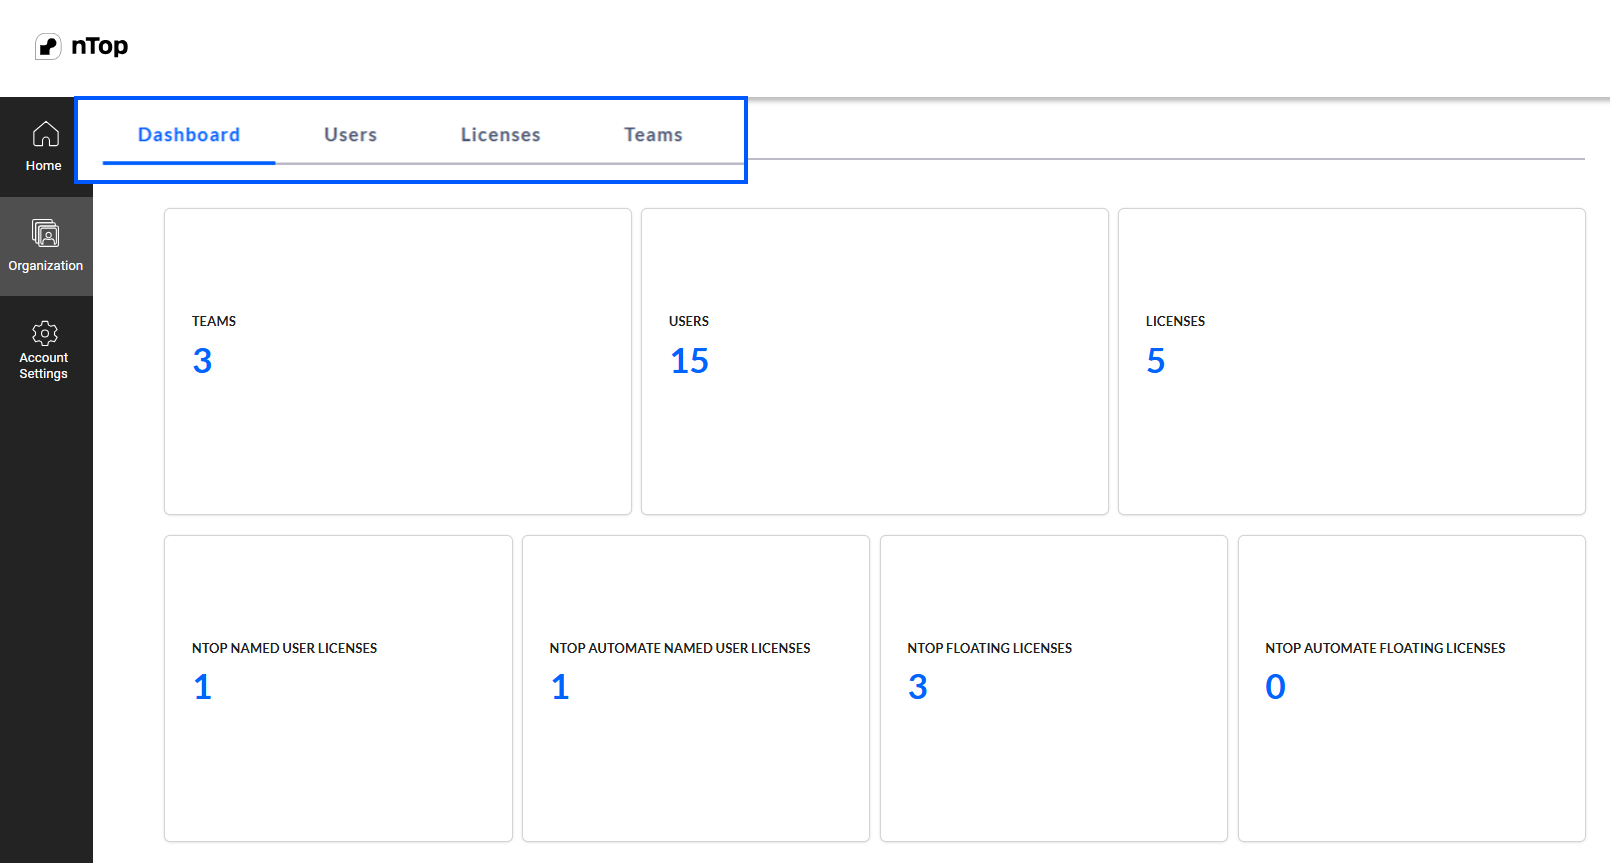
The image above shows three tabs to navigate through: Users, Licenses, and Teams.
2. Manage Users
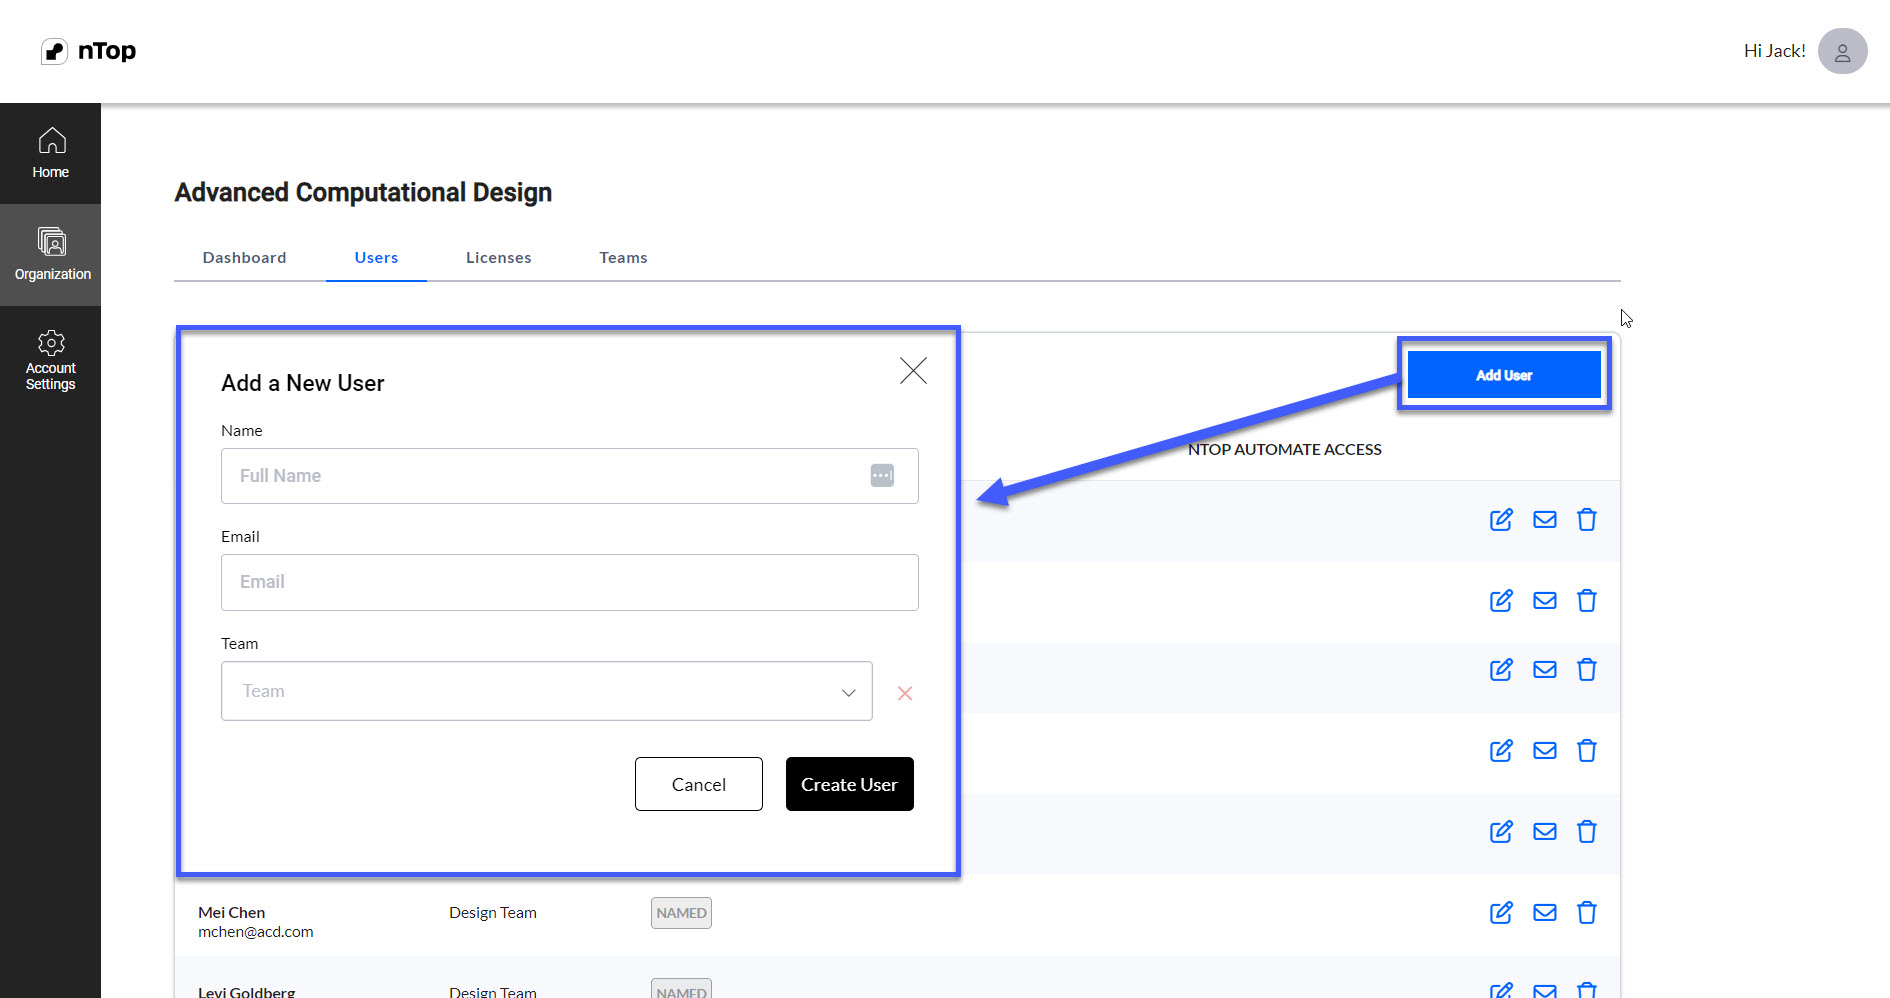
As an Org. Admin, you can invite new users to your organization. If there are users who already belong to your organization, they’ll automatically appear in the Users table. You can add a new user to your organization by selecting the Add User button in the Users tab.
Users added here will receive access to nTop Learn and nTop Support.
The Add User button will open a modal window that’ll require you to input the following information:
- Name
- Team (optional)
All the users you add will receive a welcome email from us asking them to create an account.
Below is an example of the Add a New User modal:
Once you add a user, you cannot change their email address. You can, however, change their Name and Team by clicking on the Edit icon and setting their Password in the User's row of the table.
If you encounter any issues adding a user to your organization, please contact support@ntop.com
3. Manage Teams
As an Org. Admin, you can create teams to organize your users and edit and delete teams. Teams enable you to assign licenses to a group of users much more easily.
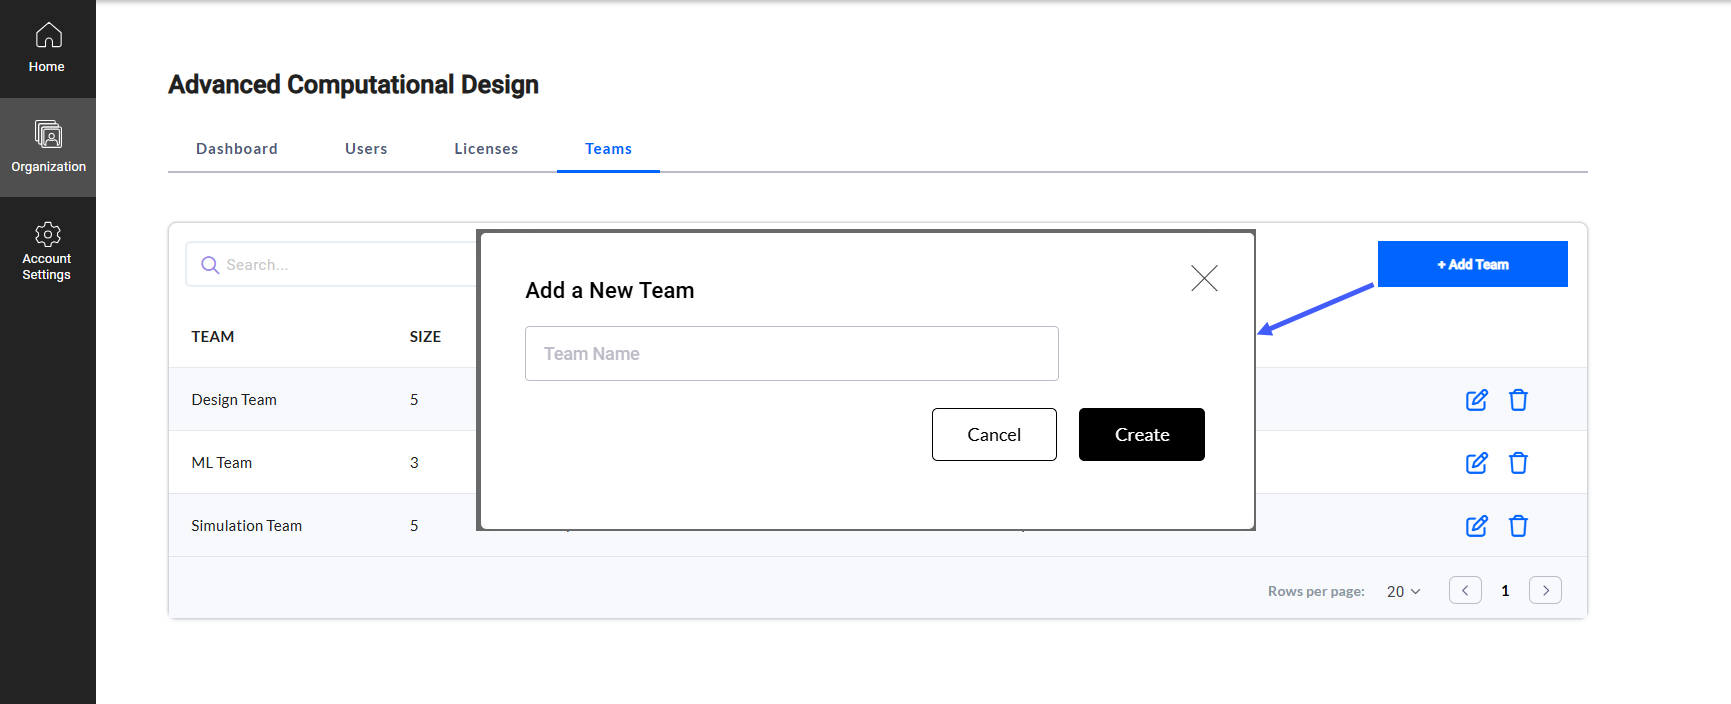
To create a team, select the Teams tab of your Org. Admin Dashboard. To Add a team, select the + Add Team button. Enter the Team Name in the modal that opens up and select Create once you are done.
If you need to change a team's name, select the Edit icon next to the applicable team. Change the name of the target team and select Save.
Select the Delete icon next to the applicable team to delete a team. Select the Yes button in the Delete Team modal, and you will be prompted with a message that asks you to confirm the deletion. Deleting a team doesn’t delete users or licenses. If you must delete a team, the users’ team will default to None.

To add users to the Team, check the step above on Managing Users.
4. Manage Licenses
As an organization admin, you can assign and un-assign licenses to your organization's users.
We highly recommend navigating these articles to learn more about different licenses.
| License Type | Details |
|---|---|
| nTop FlexNet Floating License | Getting Started with FlexNet Floating |
| nTop Cloud Floating License | Getting Started with Cloud Floating License |
In this section, you will learn about different options in the Licenses tab. On this tab, you can see the details of all your organization's licenses.
- ID
- Product (nTop or nTop Automate)
- Model (Floating or Named User)
- Assignment (Team Name/ User Name or Organization Name)
- Start Date
- End Date
- Deployment (FlexNet, Cloud or Local)
- Concurrency
The table shows an example of the different licenses and their assignments.
- nTop Automate - Named User license has been assigned to a specific user.
- nTop Cloud Floating license - 1 has been assigned to the Organization and 1 to a specific team.
The below table shows assignment options for different licensing models; these apply to both nTop and nTop Automate licenses
| Model | Deployment | Assignment |
|---|---|---|
| Floating | Cloud | Team or Organization |
| Named-User | Cloud | User |
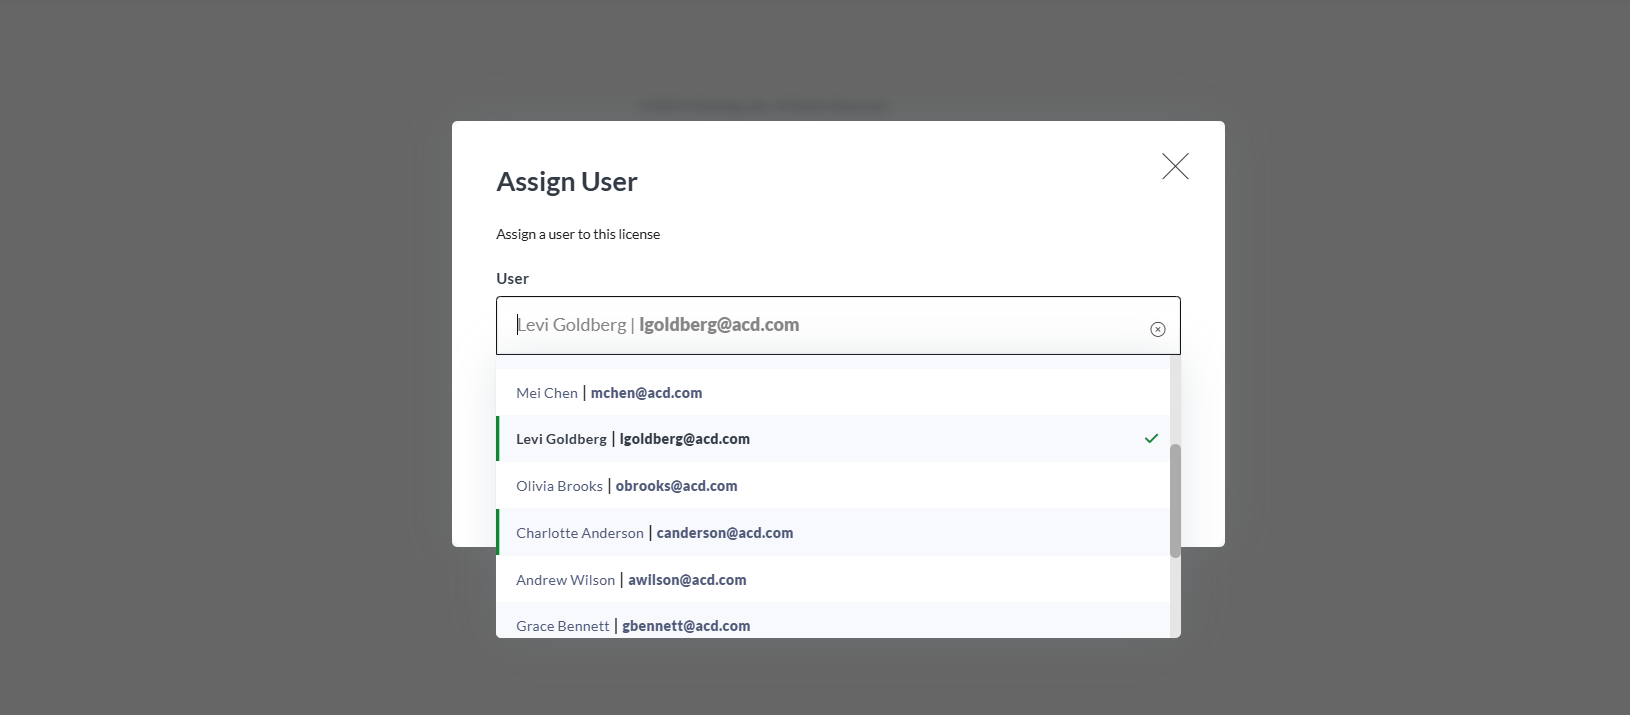
If you wish to assign a license, click the Assign License icon in the Licenses table and select a User or Team based on the license. Below are images of two different licenses assigned.
| Cloud Named-User License | Cloud Floating License |
|---|---|
|
|
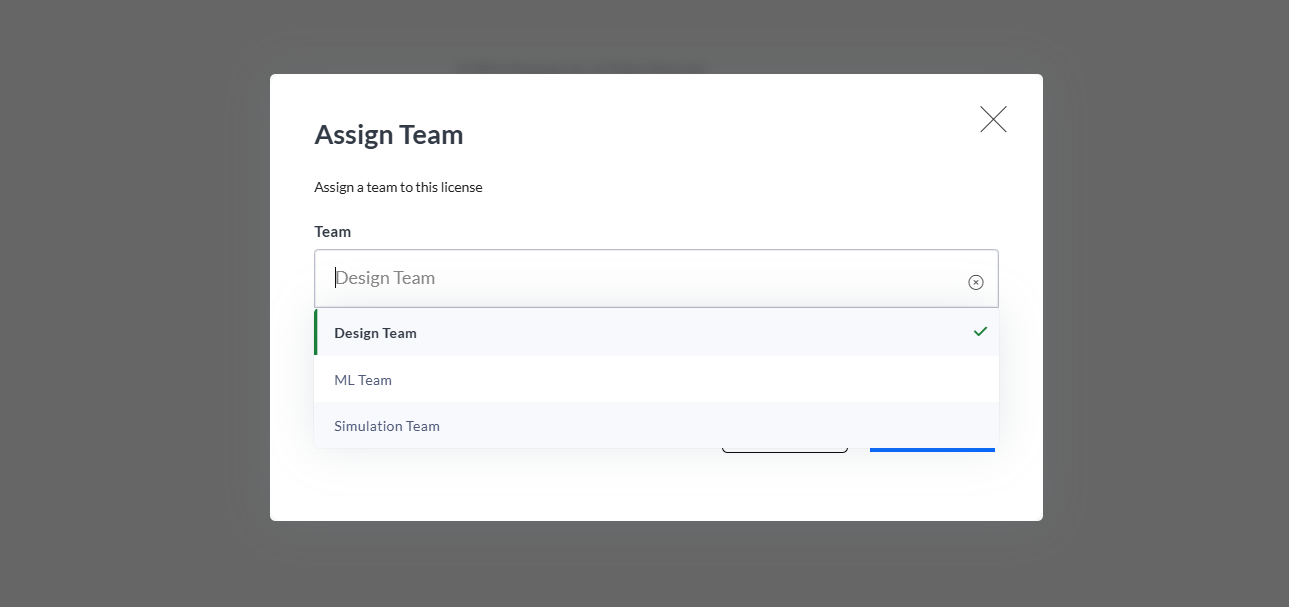
Note: The Assign Team modal has the checkbox to assign a Cloud Floating license to the entire organization instead of a specific team.
If you need to transfer a license from one user or team to another, follow the second procedure above. Select the new option, the Assign User or Assign Team modal window, for the license you want to transfer. A message will show you that the license has already been assigned and ask you to confirm that you would like to reassign it to the new user.

Note: As an Org. admin, you don’t need a nTop license to download and install the software. However, you would still need a license to log into nTop.
5. Miscellaneous Features
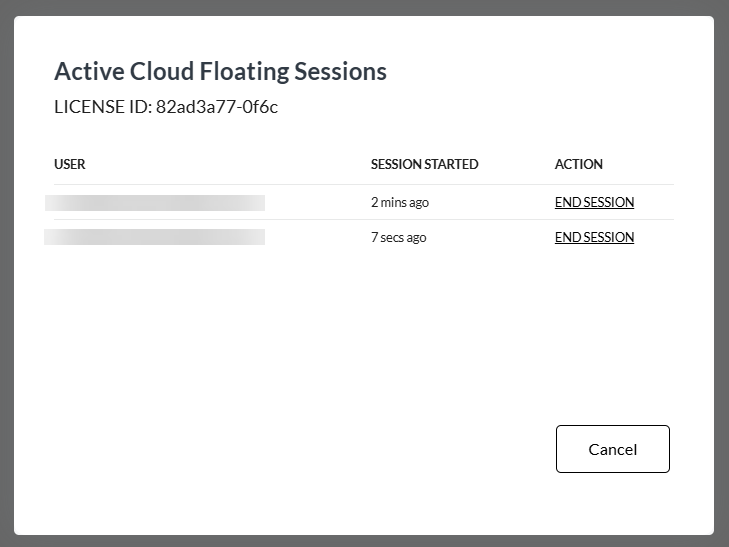
As an Org Admin, you have the ability to view which of your organization's users are currently using nTop. Starting on the Licenses tab of the Org Admin dashboard, click the arrow icon next to the floating license.
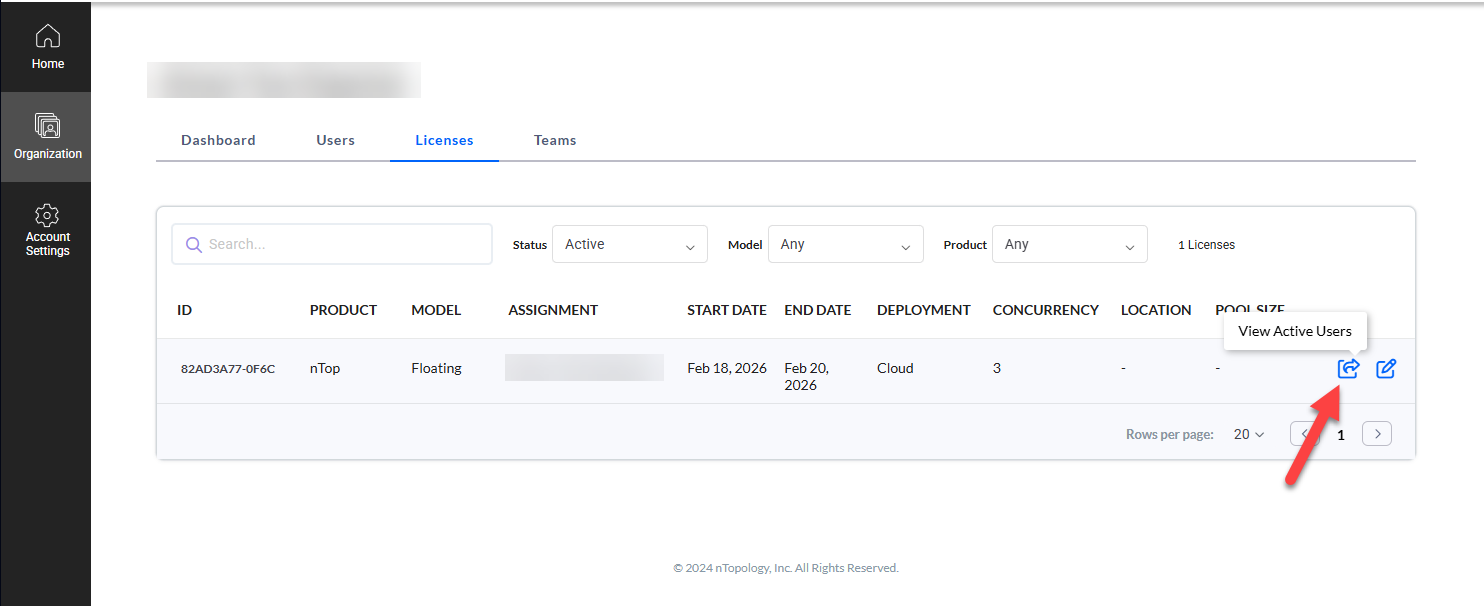
Once you click this button, a secondary window will appear showing the current active sessions that this license is being used for. You can click the End Session button next to any active sessions to immediately terminate them.