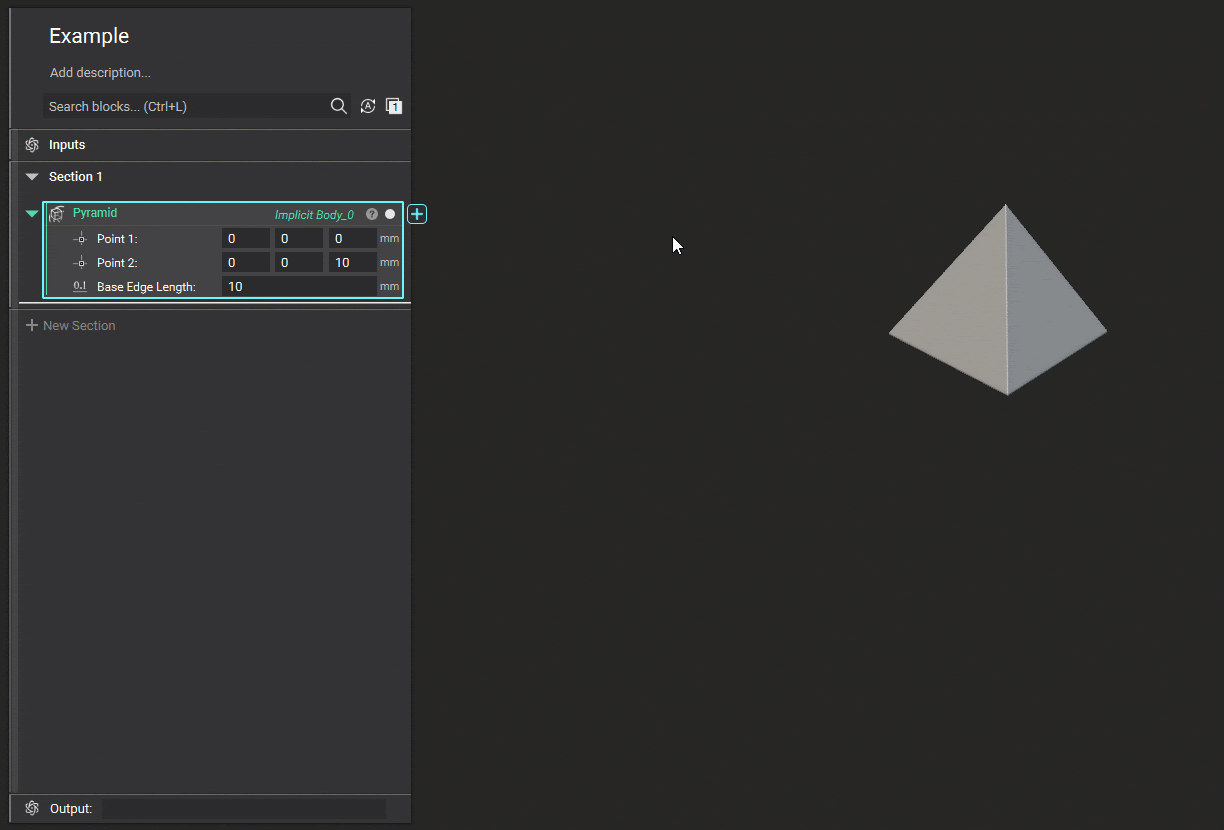
nTopology 3.31 is here! This release features our new custom block viewing and editing with quality of life enhancements. As with every release, nTopology’s dedicated support team is ready to answer your questions. Please visit support.ntopology.com to access to helpful tutorials and support articles. Table of Contents
Custom Block Viewing and Modifying
We made enhancements to make Custom Blocks more accessible, allowing you to view and modify Custom Blocks directly in your nTopology instance.
-
What it does:
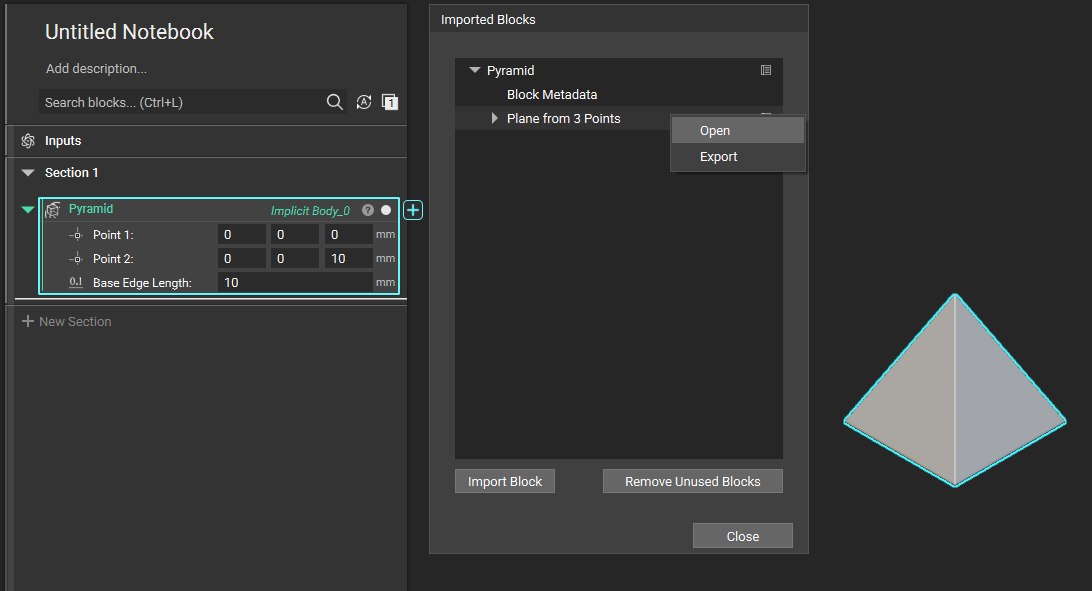
- This new functionality lets you view a Custom Block directly in your main nTopology instance. You can select “Open” from the Imported Blocks menu (shown below)
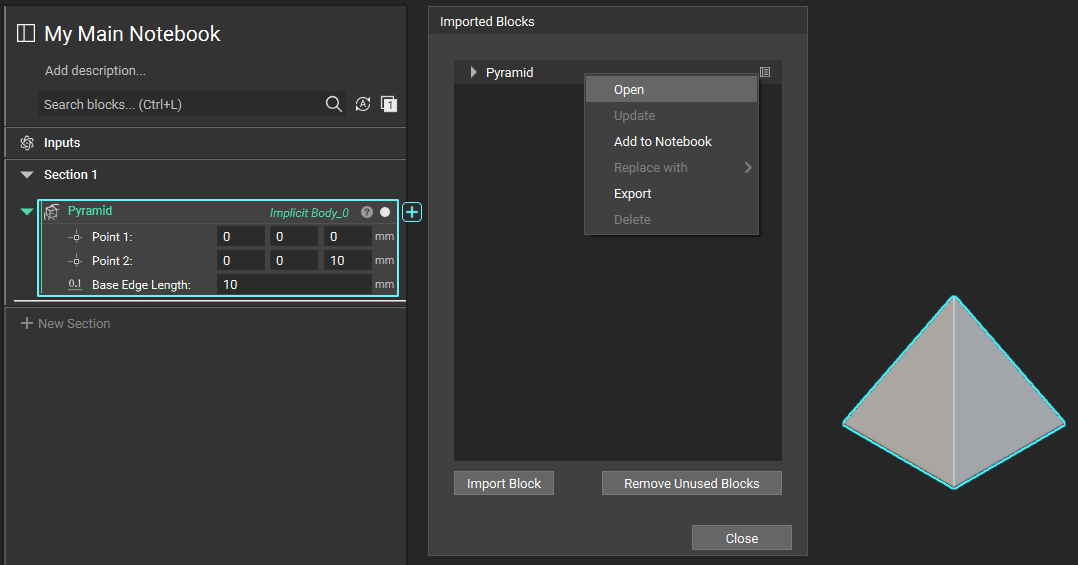
or you can view it by right-clicking on the Custom Block directly in your notebook and selecting “Open Block” (shown below).

- Once opened, the notebook of the Custom Block will be displayed, and you can inspect its contents. Select the “Back” icon at the top left of the notebook to return to the main notebook.

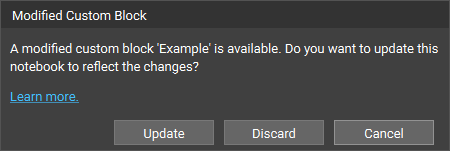
- If you want to modify the Custom Block, you can make your modifications in the opened Custom Block notebook. Once you select the “Back” icon, you will be presented with one of four pop-up windows based on your modifications. The scenarios are:
-
Update (no inputs/output change) - the most common scenario occurs when a change is made to a Custom Block that does not modify its inputs or output or is a name change.
-
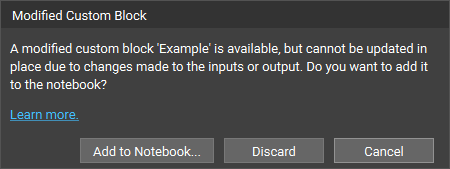
Add to Notebook (inputs/output change) - the scenario when a Custom Block’s inputs or outputs are changed. You need to add it to the notebook.
-
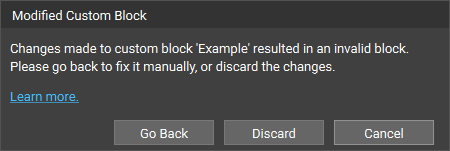
Manage - the scenario when you modify a Custom Block that is not in your current notebook. Usually, this means the Custom Block is more than a single level deep in the Custom Block hierarchy tree, and you go directly back to the main notebook.
-
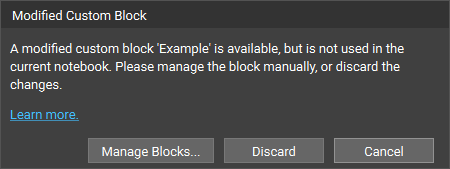
Invalid - the scenario that occurs when a Custom Block has no inputs or output.
For more information on modifying Custom Blocks, please visit our FAQ page here.
Tips:
- All Custom Blocks used within a nTopology file are internalized - changes will only be reflected in the currently open file. If you want the changes to be externalized, export the Custom Block to a directory and import it into other files.
- When modifying Custom Blocks, pop-up windows will appear when you select “Back” to help guide you. Each pop-up window will have a Learn More link, redirecting you to a support page with more information.
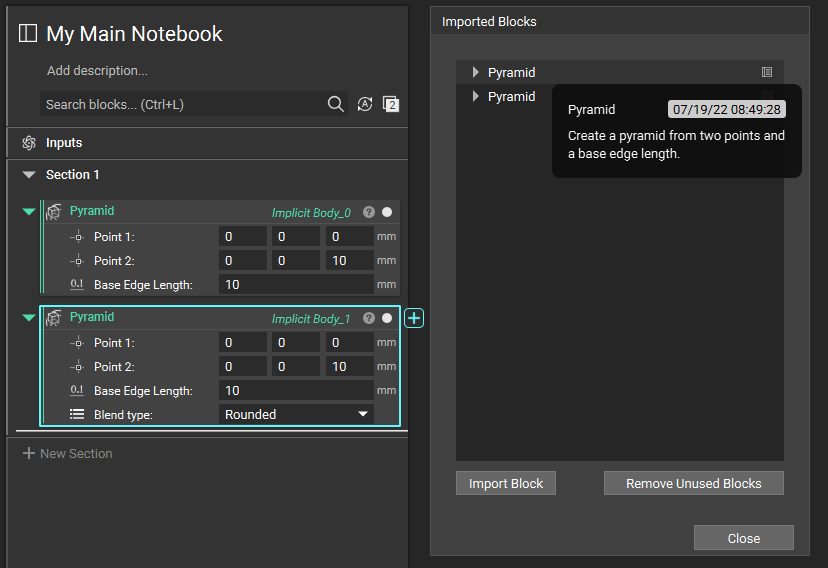
- "Remove Unused Blocks" will remove all unused Custom Blocks at all levels in your file. We recommend using this to clean up your file, making the Imported Blocks menu readable and speeding up your file's load time.
- Hovering over the Custom Block line in the Imported Blocks window will show a tooltip that contains the name, description (if available), and last modified date (if the Custom Block was imported into or modified, starting in nTop version 3.31).
- For Custom Blocks that contain Custom Blocks inside them (nested Custom Blocks), you can directly open them by uncollapsing the chevrons in the Imported Blocks menu and selecting Open on the nested Custom Block.
Precision Render for Section Cut
- The Section Cut supports user workflows by providing access to the internals of a model for better insight. Examples are the structure of lattice structures, gyroid-based heat exchangers, or accurately comparing multiple bodies to validate critical boolean operations at various stages of design workflows.
- Users are known to work in different model resolutions depending on system performance and run Precise Render operations when an accurate model representation is required or snapshots for presentation purposes. To date, it was impossible to generate precise renders using Ctrl + H on the selected body during a Section Cut operation. We now support accessing the Precise Render for the selected body while in a section cut view.
- After accessing Precise Render and pressing Exit, the section cut operation resumes from the original state.
`
| Section Cut without Precise Render | Section Cut with Precise Render |
 |
 |
Block Updates
- We improved the Simplify Mesh by Threshold block algorithm, reducing the block run time by 15-50%. The increase in speed that you observe will vary depending on the model, and models containing large flat regions will benefit most from this improvement.
- We made improvements to the CAD Body from Implicit Body (Beta) block to support converting multiple connected Implicit Bodies into one CAD Body. Previously this would produce two separate parts.
- We released a new version of the Implicit Body from CAD Body block. Version 1.2.0 fixes a bug introduced in version 1.1.0, and 1.1.0 is now deprecated. The bug resulted in either no Implicit Body appearing or additional artifacts present in the body.
Bug Fixes
- We fixed a bug in the Extend Open Lattice Beams block that was adding extra thickness to the lattice’s beams when none of the beams met the extension criteria.