
Objective:
Learn how to run nTop in the cloud using Rescale.
Applies to:
- Cloud computing
- nTop
- Rescale
Procedure:
nTop has partnered with Rescale, a cloud hosting company, to offer cloud computing for nTop. There are two options for using nTop on Rescale, either as a virtual desktop or batch cloud computing.
How to use Rescale as a virtual desktop:
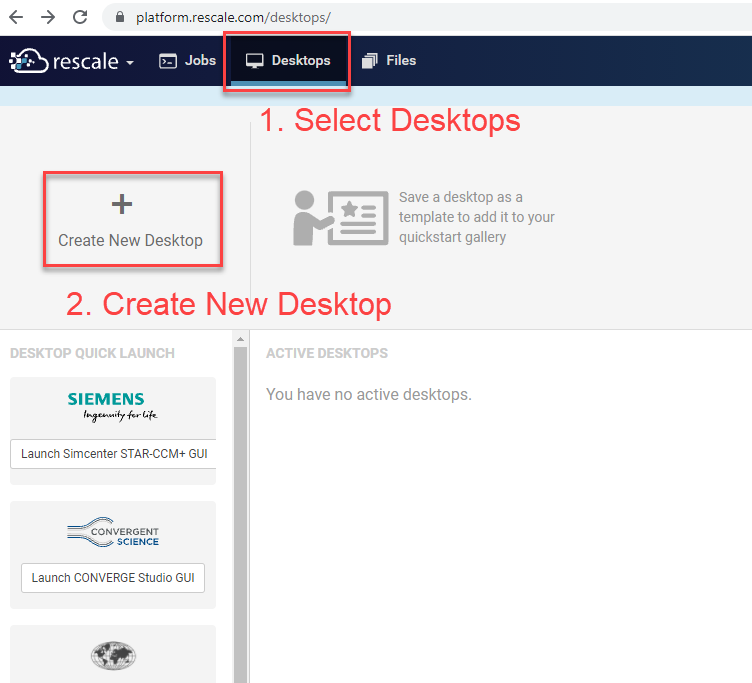
- Select Desktops and press the "Create a new Desktop" button
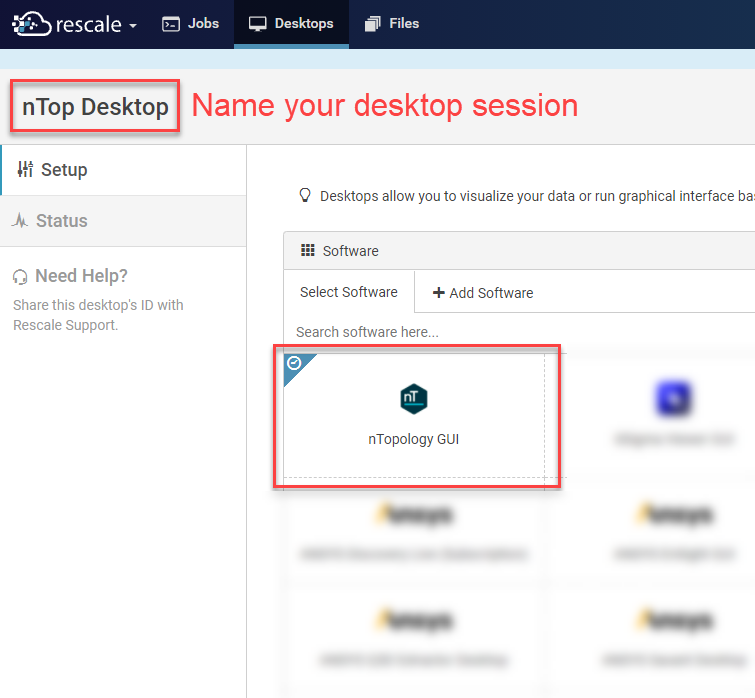
- Name your desktop session and choose nTop GUI as your software. You can also choose which version of nTop to run.
-
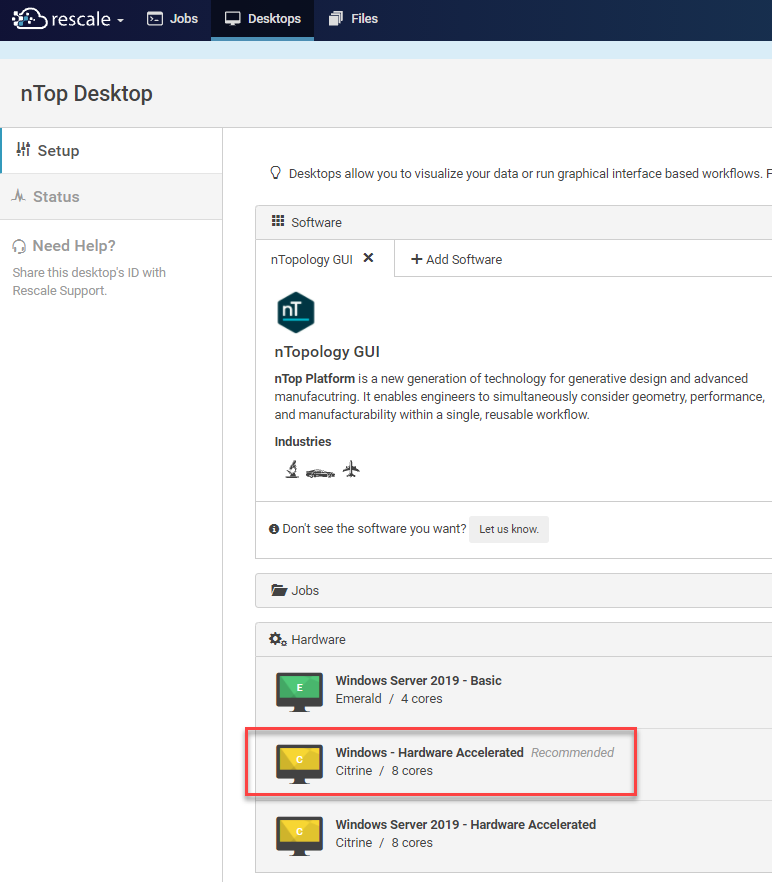
Choose your hardware. Rescale offers a virtual desktop for nTop with the following specifications:
- Physical Cores: 8 Intel Xeon (Broadwell)
- GPU: NVIDIA Tesla M60
- Memory: 122 GB
- Windows, SSD
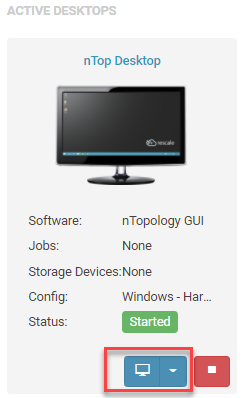
- Provisioning the machine and attaching the software takes about ten minutes. Once this is done you can launch the desktop by clicking on the blue desktop button.
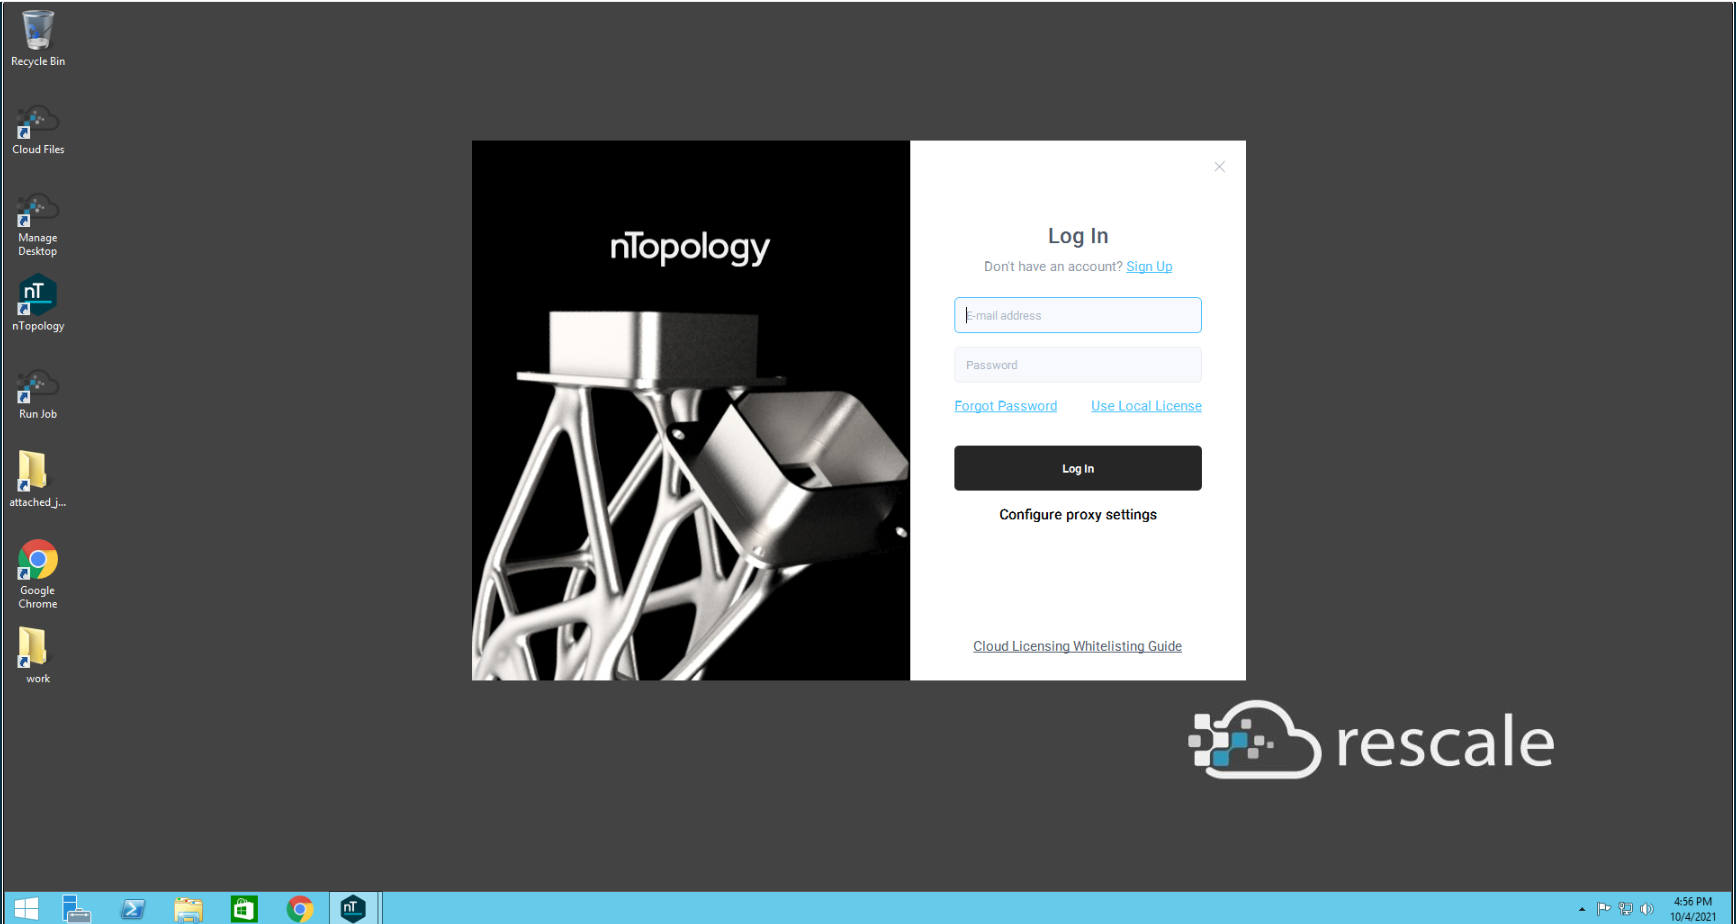
- Virtual desktop is now available in your browser. Select the nTop icon on the desktop to get started.
- Open up nTop and enter your credentials to log in and get started. If you normally use a local license, you can still log in with your credentials because every local license comes with a matching cloud license.
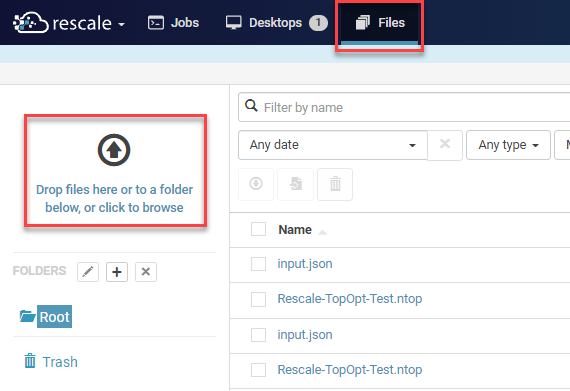
- To upload files to the virtual desktop, navigate to the "Files" menu. Drag and drop files from your local machine into the interface to upload your files.
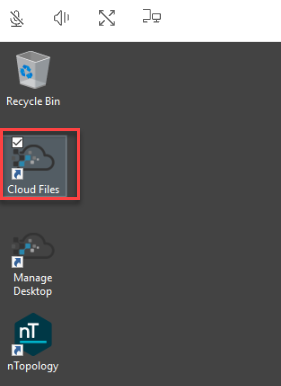
- To access your files on the virtual desktop, click on the “Cloud Files” icon within the virtual desktop. This brings up the “Files” browser with your files in cloud storage.
- Navigate to the file and select the download button. You’ll then be prompted to save the file to the “Download” folder on your virtual desktop.
- Now you are ready to use nTop in a virtual desktop environment. Don't forget to terminate your desktop session once you are done so you don't run up hardware costs.
How to use Rescale to run a batch job:
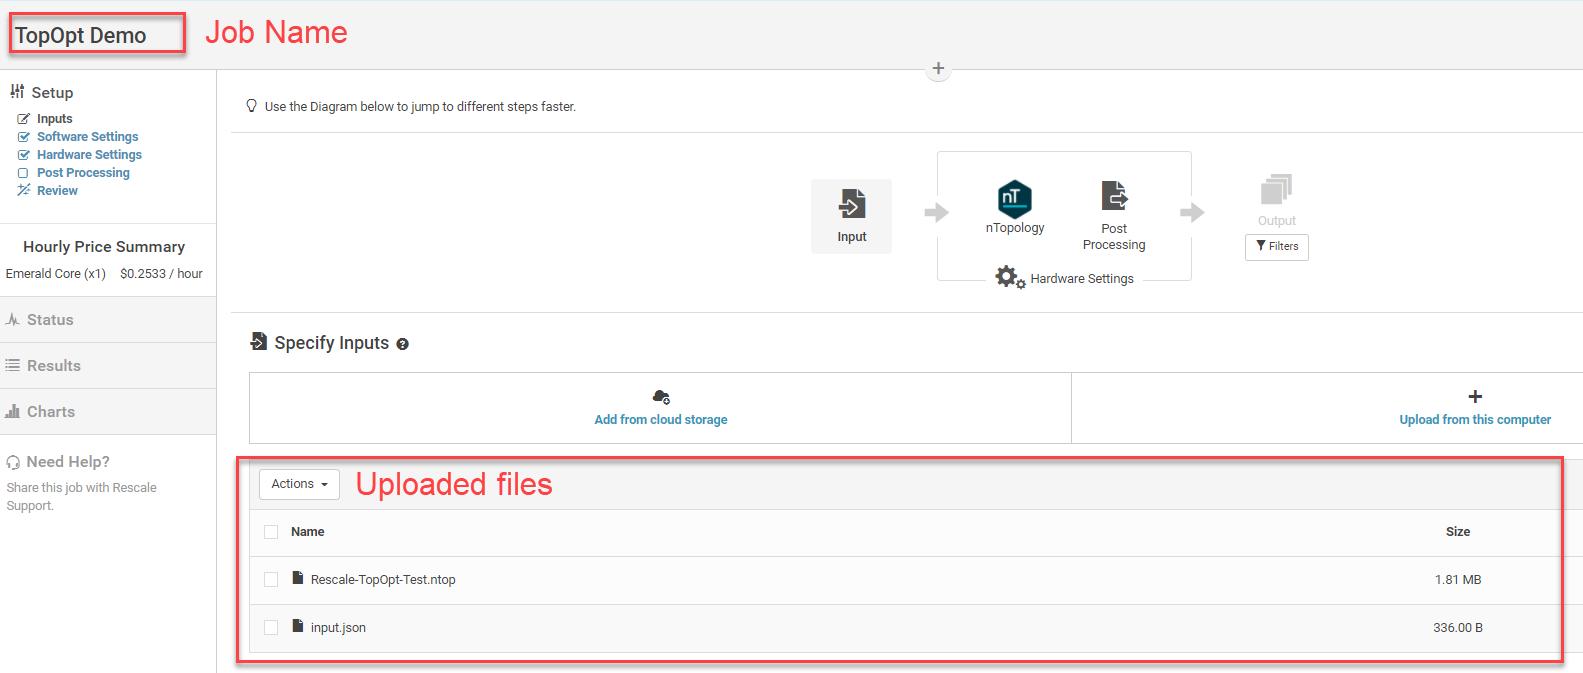
- Navigate to the Jobs menu and click "Create New Job"
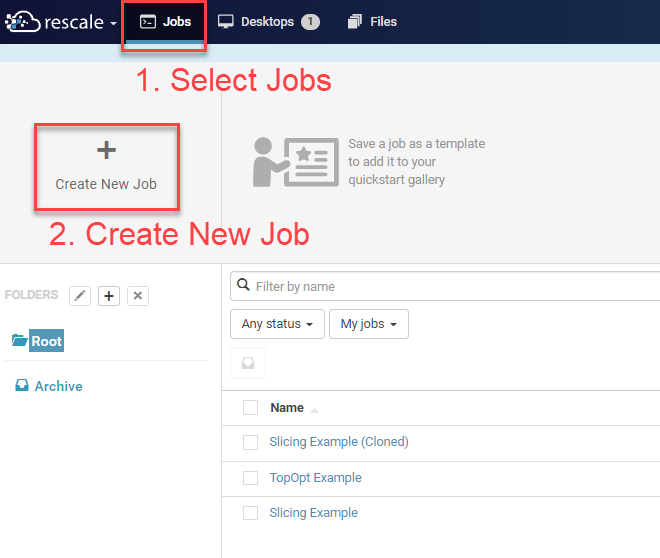
- Upload your nTop file (*.ntop)
- Upload a JSON file with the input parameters you want to use in the Notebook
- Name your Job
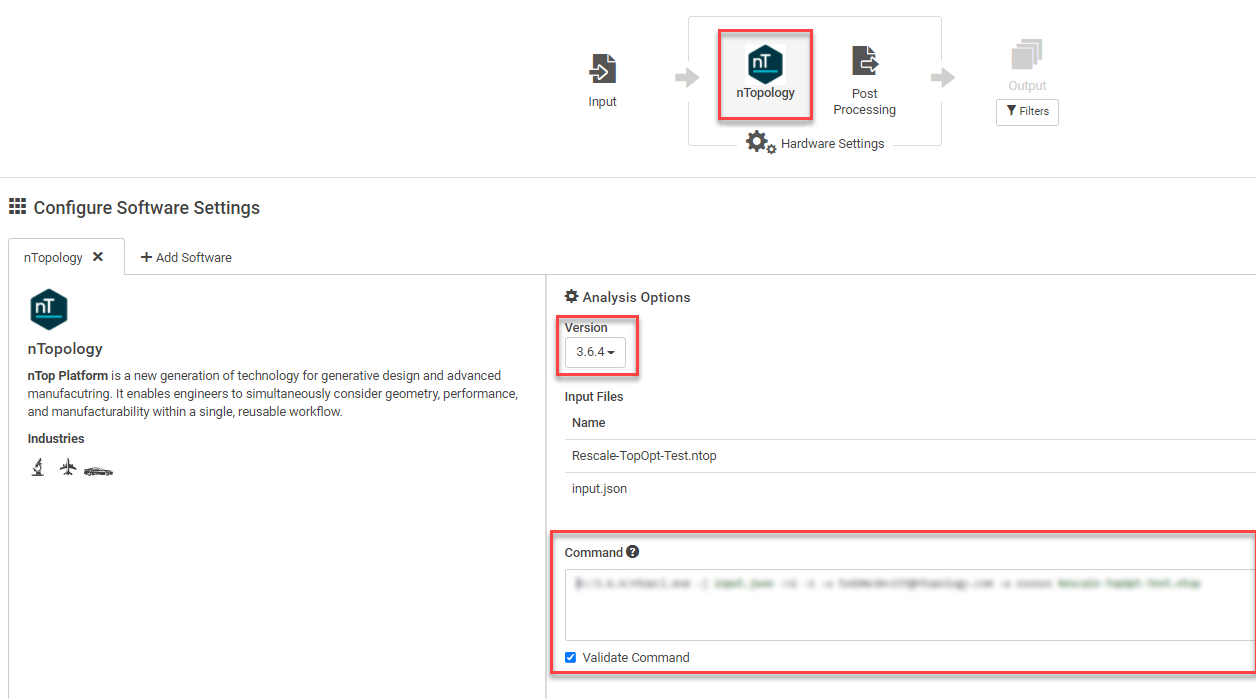
- Choose nTop, the version you want, and provide Command line options. An example of what needs to be in the command line is below:
0:/3.6.4/ntopcl.exe -j input.json -v2 -s -u username@email.com -w xxxxxxx Your-nTop-model.ntop- 0:/3.6.4/ntopcl.exe is the path on the provisioned machine
- input.json is the name of the JSON file you uploaded that contains the input parameters
- -v2 sets the verbosity of the output to warnings, errors, and runtime progress
- -s overwrites the provided *.ntop file with the results
- -u and -w specify your nTop username and password
- Your-nTop-model.ntop is the name of your nTop file
-
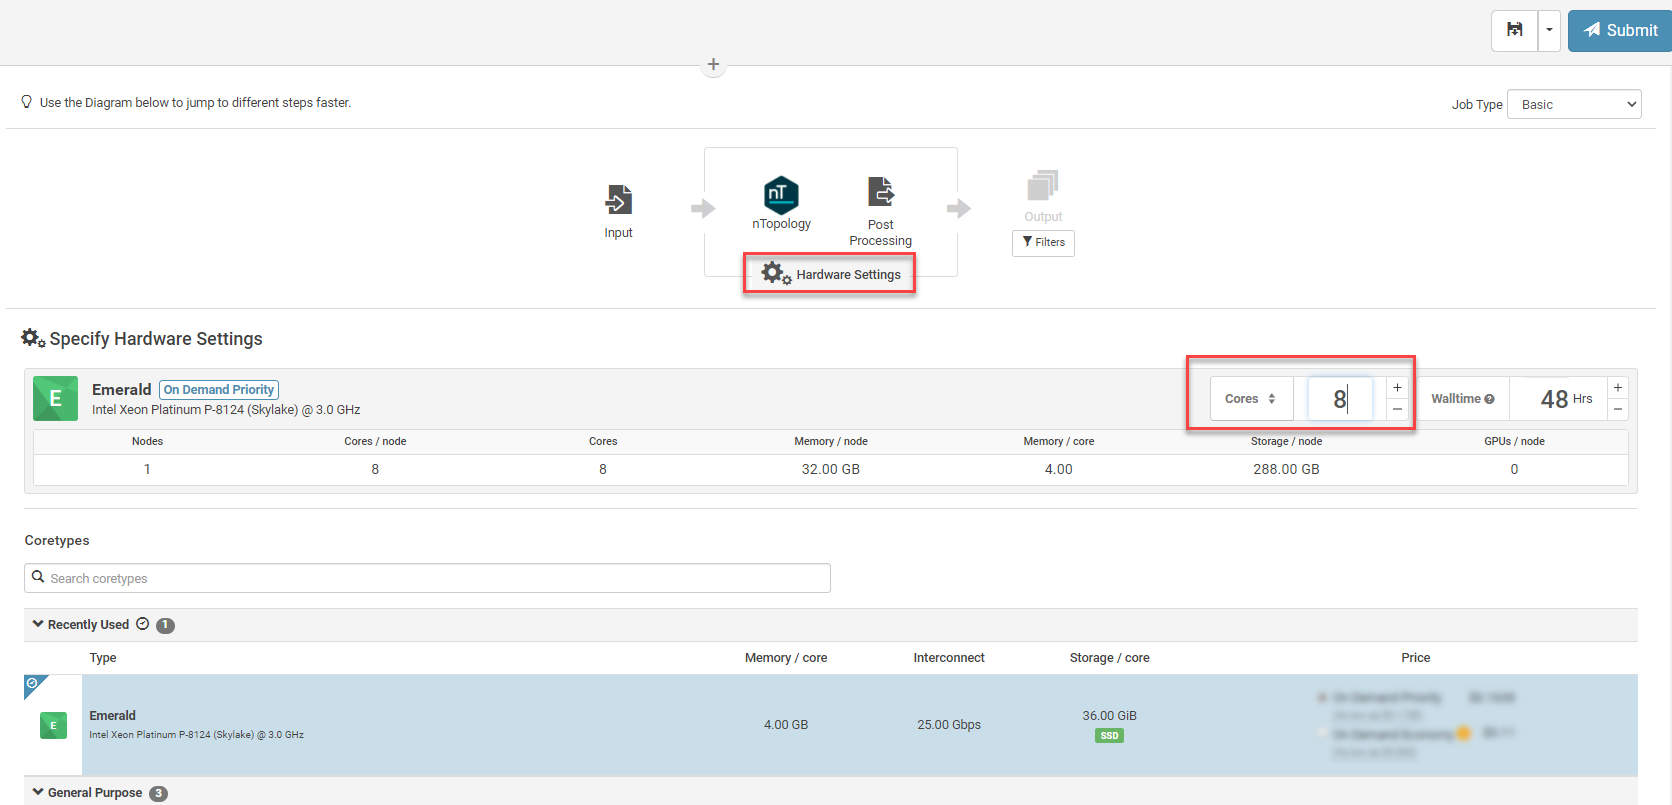
Select Hardware Settings
- Select the number of cores you want and choose your virtual machine
- Hit Submit
- Your machine is then provisioned and your job is started. Once it is done, you receive an email updating you of the status of your job
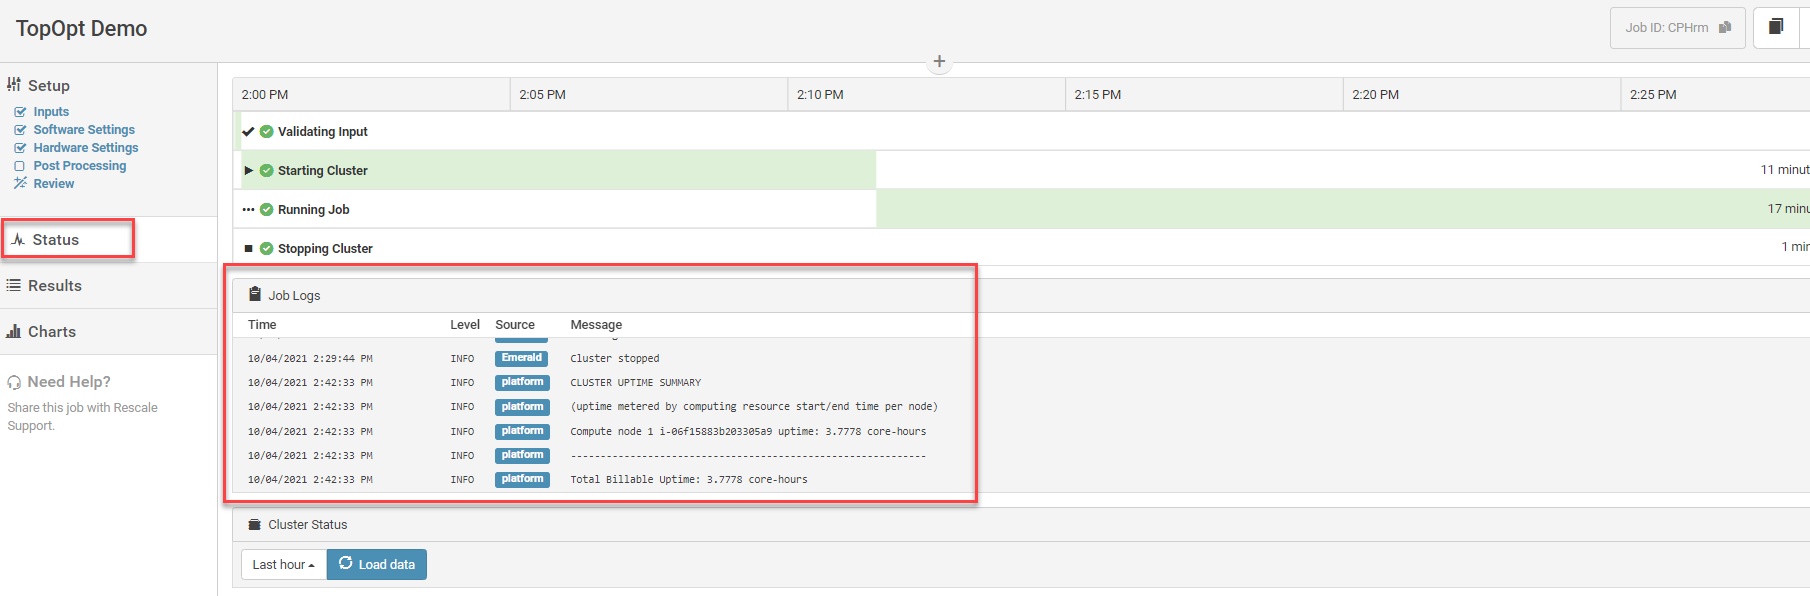
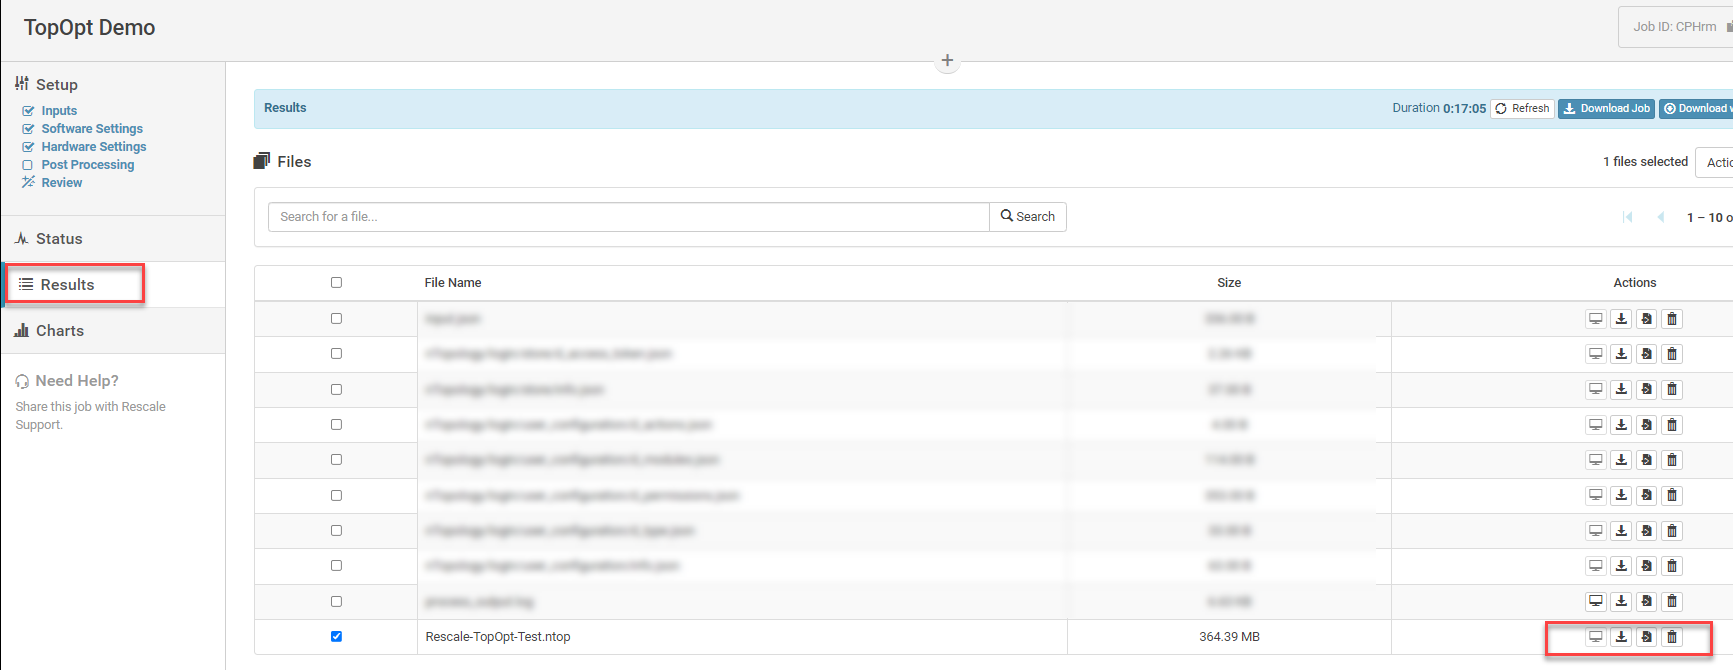
- Navigate to the Results window to download your results back to your machine
Feel free to reach out to your Sales associate or Support if you are interested in learning more about nTop and Rescale.