Objective:
Learn how to use the Supports - Bar - Straight Tips - Part to BPlate (External) custom block to generate bar supports under a part. In this example, you will learn how to use a combination of blocks to generate supports necessary for additive manufacturing.
Applies to:
- Additive manufacturing
Procedure:
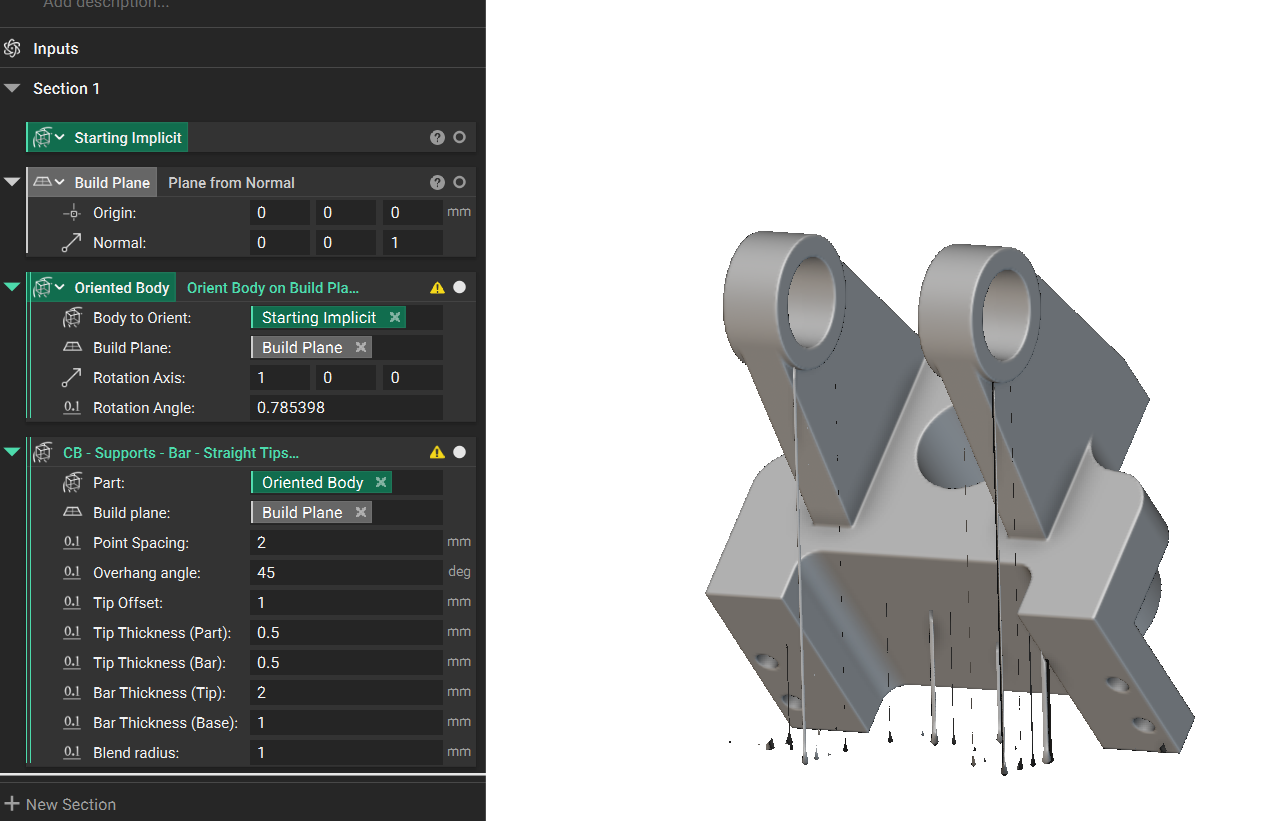
1. Import the Custom Block: Import the Supports - Bar - Straight Tips - Part to BPlate (External) custom block.
2. Fill out the inputs:
Input 1: Part
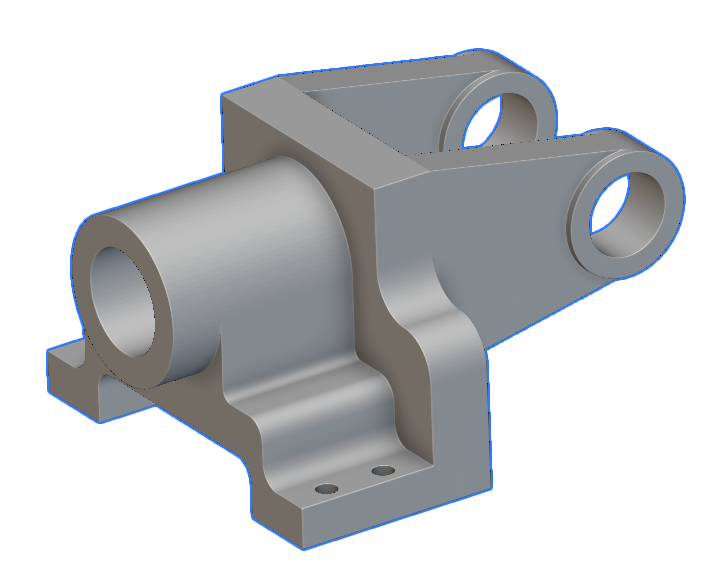
The input body is the part we want to support. We use this example's bracket below
Input 2: Build Plane
- Define the build plane that your supports should be placed on
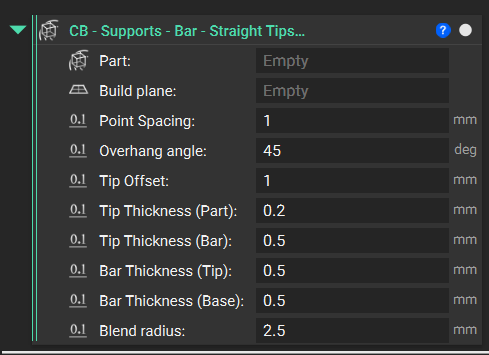
Inputs 3-10:
These inputs define the bar support geometry and its position on the part.
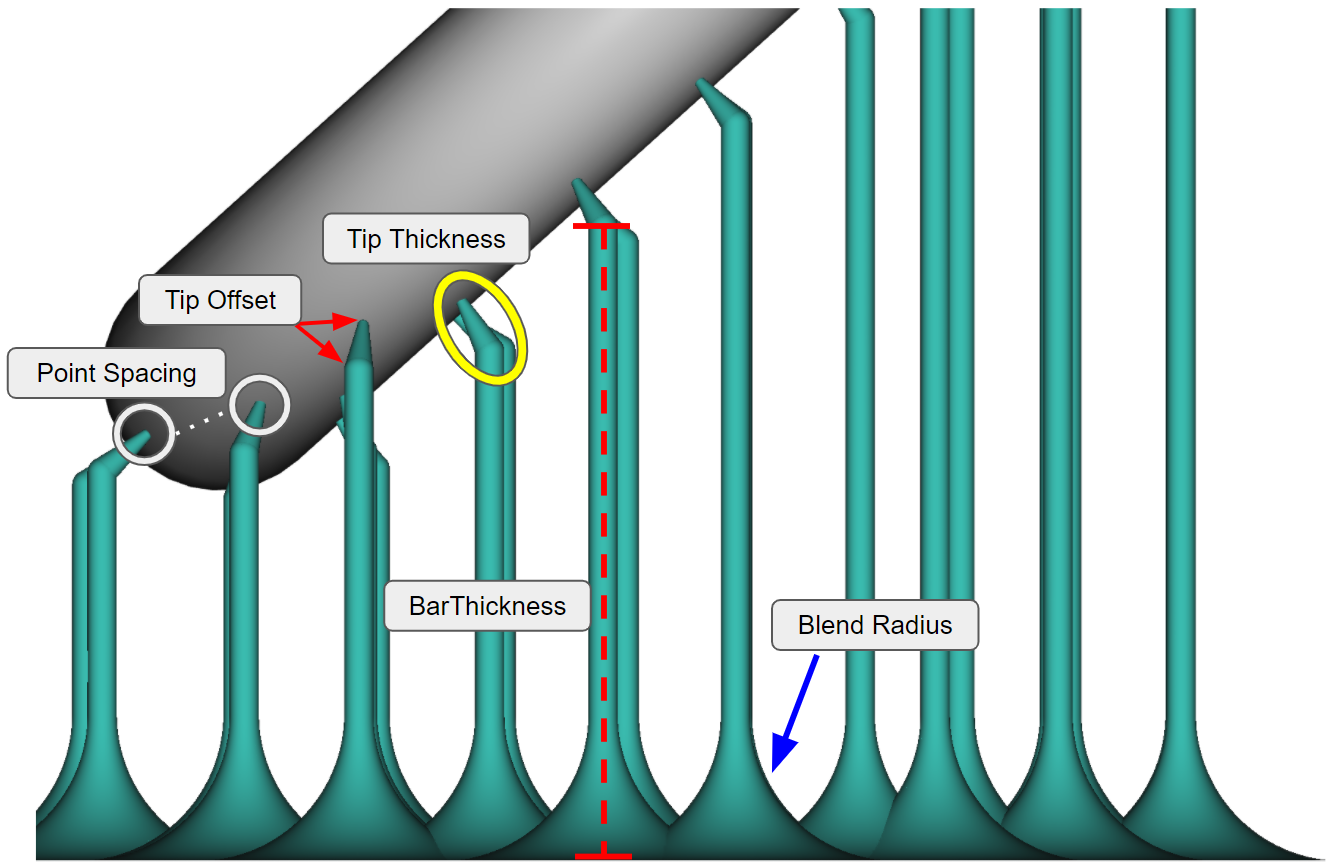
Input 3: Point Spacing
- Defines the space between the tip points on the part
Input 4: Overhang Angle
- We recommend entering a value slightly less than the required Overhang angle to capture the entire area. An example of 44.8 degrees for a required 45 degrees.
Input 5: Tip Offset
- Defines the 'length' of the tip
Input 6/7: Tip Thickness (Part > Bar)
- Controls the taper of the tip from the Part to the Bar
Input 8/9: BarThickness (Tip > Base)
- Controls the taper of the bar from the Tip to the Base
Input 10: Blend Radius
- Controls the radius of the support beams connecting to the build plate
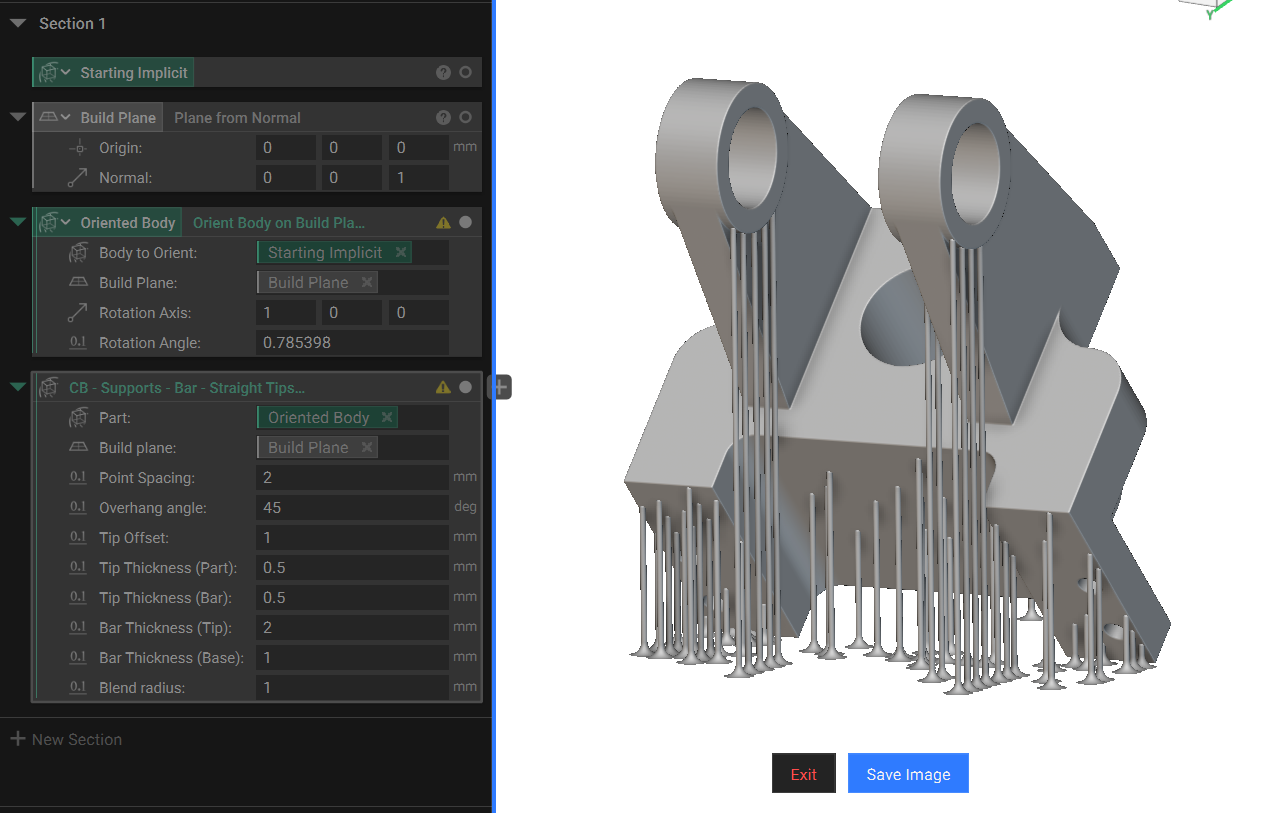
Note: When visualizing supports, it's common for them to appear irregular or disjointed due to their very small features. To see the correct geometry, we recommend using Precise Render to visualize the supports. The example below shows the same part and supports with and without Precise Render enabled.