
nTop 6.2 is here! This release introduces externally defined Custom Blocks and Custom Block Libraries, along with new Geometry blocks for filleting, ramping, and sweeping. As with every release, nTop's dedicated support team is ready to answer your questions. Please visit support.ntop.com to gain access to helpful tutorials and support articles.
Externally Defined Custom Blocks and Custom Block Libraries
Fillet Curves
Fillet Polycurve Vertices
Ramp
Sweep Along One Rail
Mesh from Implicit by AT
Usage Improvements
Externally Defined Custom Blocks and Custom Block Libraries
- Starting in nTop 6.2, Custom Blocks can be defined externally to the notebook. Instead of being embedded inside your notebook upon import, a Custom Block can live in its own .ntop file on disk, and your notebook holds a reference to that file, much like how a function in code references a definition stored elsewhere.
- This resolves a longstanding limitation: previously, after importing a Custom Block, any changes made to the source .ntop file required a manual re-import to take effect. Now, every notebook referencing that file reflects the change upon the next restart of nTop.
- As a result, a single Custom Block definition can be shared across many notebooks, and Custom Block files can be version-controlled, shared via Git, and organized into libraries.
- You can also define Custom Block Libraries as a folder of .ntop files, sharing the same external-reference behavior as an individual Custom Block.
- Embedding is still the default behavior. Opt into external definitions in the user settings under "Import blocks as external references."
- See the full documentation for more information.
Fillet Curves
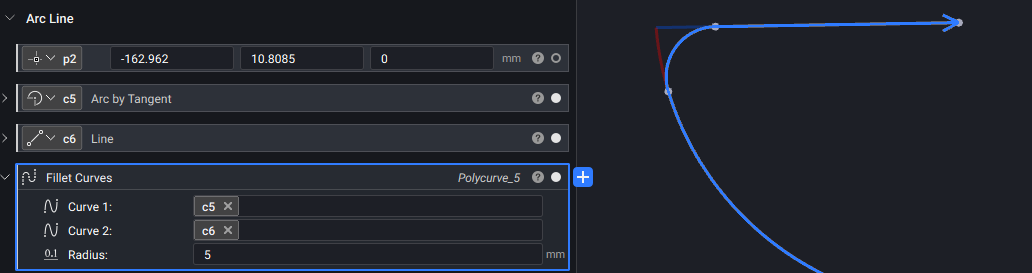
- The Fillet Curves block creates an arc connection between two coplanar curves sharing an endpoint and trims the inputs. The fillet is applied at the interior of the vertex.
- Location: Create > Curves
- Curve 1: First curve to fillet.
- Curve 2: Second curve to fillet.
- Radius: Radius of the fillet arc.
- Output: Polycurve
Fillet Polycurve Vertices
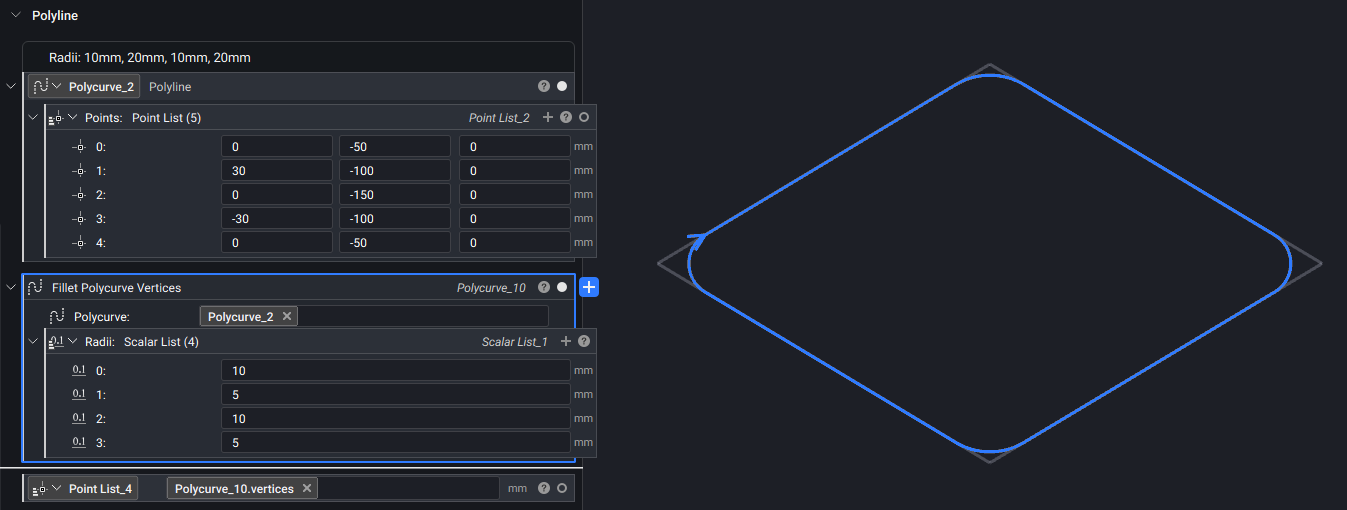
- The Fillet Polycurve Vertices block creates a fillet arc at each vertex of a polycurve. Fillets are applied to the interior angle at each vertex, and neighboring segments must be coplanar.
- Location: Create > Curves
- Polycurve: Polycurve whose vertices will be filleted. Neighboring segments must be coplanar.
- Radii: Fillet radius at each vertex. The number of values must match the number of vertices.
- Output: Polycurve
Ramp
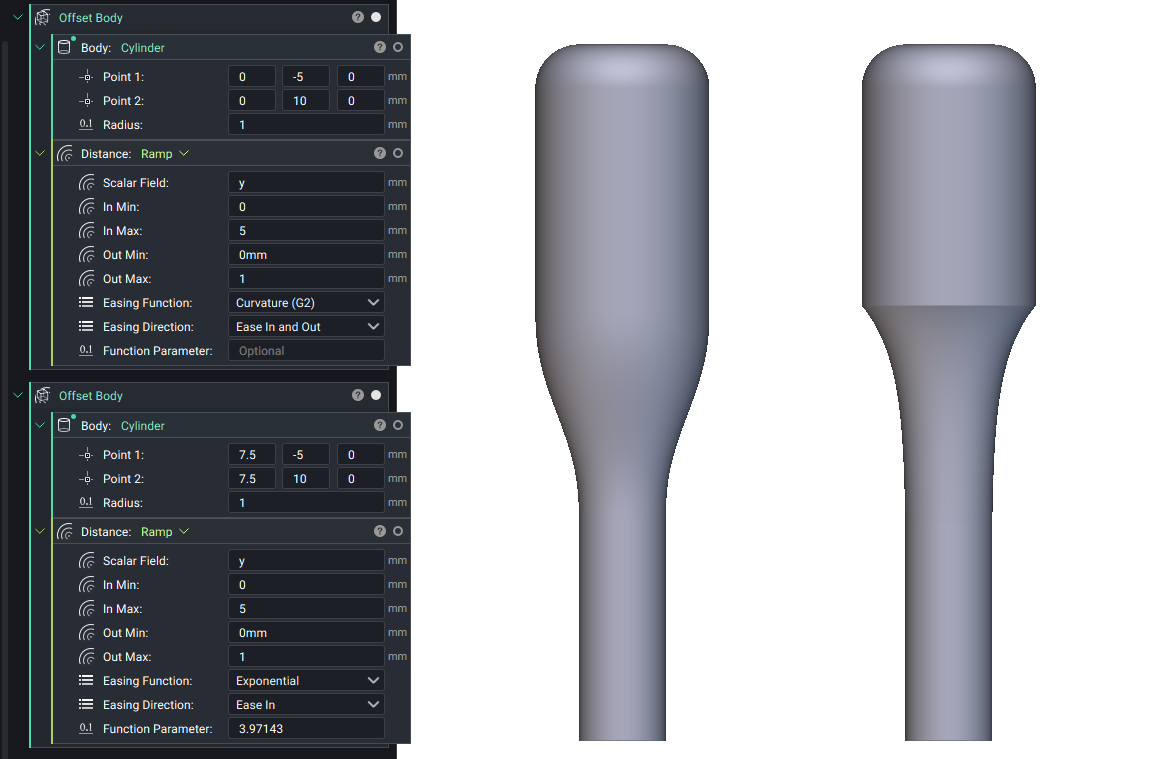
- We have added a new overload of the Ramp block with more Easing Functions and parameters, giving you finer control over how a value transitions between an input range and an output range.
- Location: Math > Utilities
- Scalar Field: Field to ramp.
- In Min: Input range min value.
- In Max: Input range max value.
- Out Min: Output range min clamp value.
- Out Max: Output range max clamp value.
- Easing Function: Function used to shape the transition. Geometric (G0) leaves it linear. Tangent (G1) and Curvature (G2) meet the clamped region with matching tangent and matching curvature, reproducing the Continuity option of the other Ramp overloads when Easing Direction is Ease In and Out. Power flattens the eased end the more the larger Function Parameter is, where 2 is quadratic and 3 is cubic. Sinusoidal is a quarter cosine and falls between G1 and G2. Circular follows a quarter circle and arrives vertically at the opposite end. Exponential is the only option that does not leave the eased end perfectly flat, and its Function Parameter sets how sharply it accelerates.
- Easing Direction: Which end of the transition the easing function shapes. Ease In smooths the start and leaves the end sharp, Ease Out does the reverse, and Ease In and Out smooths both.
- Function Parameter: Shapes the selected Easing Function: the exponent for Power and the rate for Exponential. Required by those four functions, ignored by the others, and must be greater than zero.
- Output: Scalar Field
Sweep Along One Rail
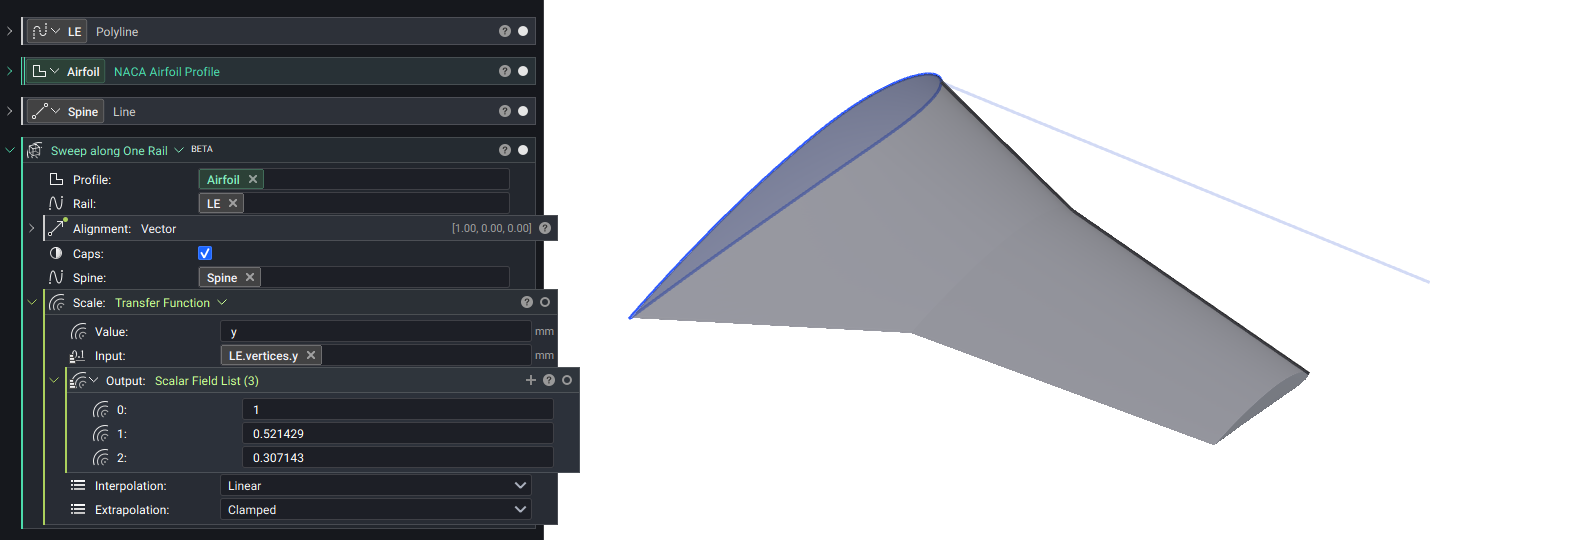
- The Sweep Along One Rail block sweeps a section of an implicit body along a rail curve while a vector field drives its orientation.
- Location: Modeling > Operations
- Body: Implicit body to sweep. The cross section of the body within the Start Plane will be swept along the rail.
- Plane: Plane used to define the cross-section of the body at the start of the sweep.
- Rail: Rail curve to sweep along.
- Alignment: Vector Field driving the orientation of the section along the rail. The section's local X direction follows it as closely as the Plane perpendicular to the rail allows.
- Caps: If checked, closes the swept body with planar caps at the start and end of the sweep.
- Spine: Optional spine Curve to define section Plane orientation.
- Scale: Optional Scalar Field that uniformly scales the section within the moving plane. If not provided, the section is not scaled.
- Output: Implicit Body
Mesh from Implicit by AT
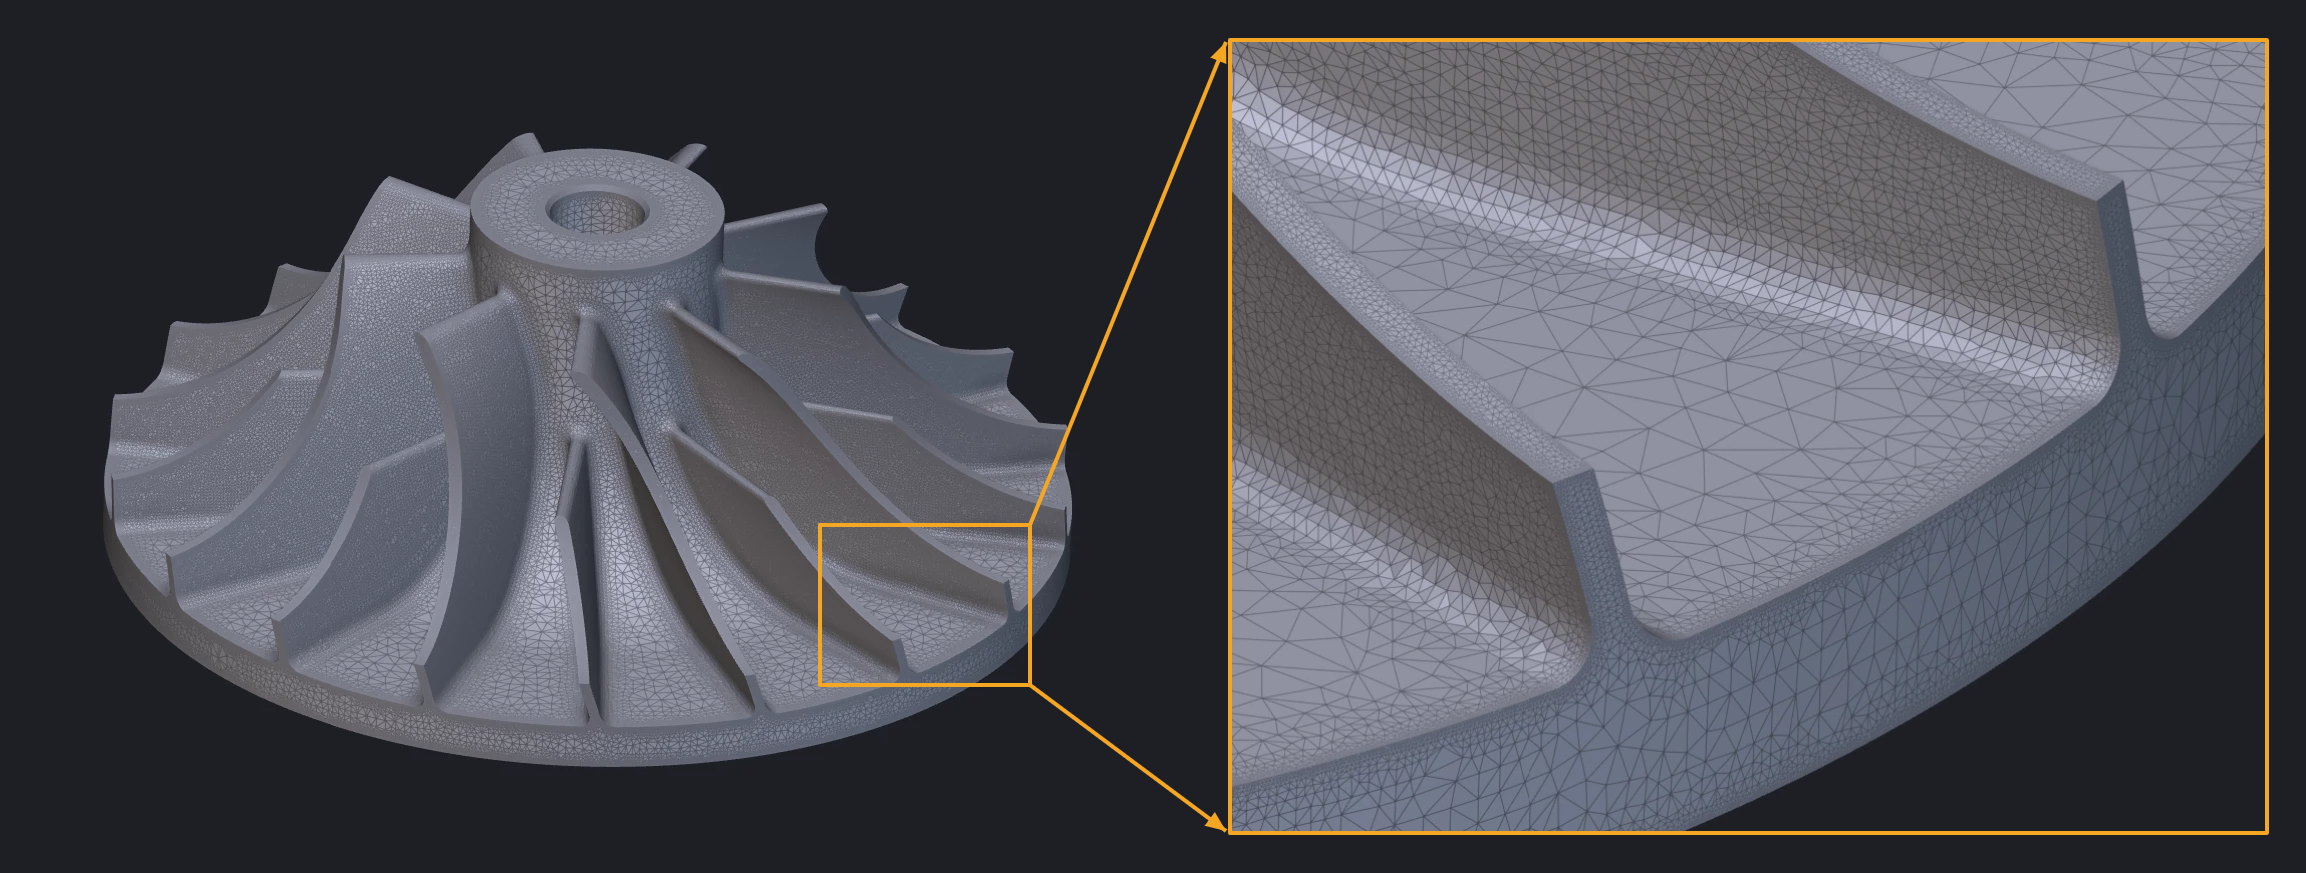
- The Mesh from Implicit by AT block has a new Sharpen option that improves meshing at sharp edges and corners. When Remesh is also on, the sharpened edges are kept through remeshing. Sharpen is off by default, and turning it on increases the time it takes to run the block.
- This makes it possible to mesh implicit geometry with crisp edges and corners, such as prismatic or machined features, without having to lower the tolerance.
- Location: Beta > Utilities (also under Utilities > Conversion)
- Body: Implicit body to convert.
- Tolerance: The maximum allowable deviation of the tessellation from the implicit geometry. Smaller values give a more precise mesh but take longer to compute.
- Sharpen (new): Option to preserve sharp edges, corners, and walls thinner than the meshing tolerance. Enabling this option increases compute time.
- Remesh: Remesh the adapted tessellation for better triangle quality. Note that there is a risk of producing self-intersections.
- Output: Mesh
Usage Improvements
- We have updated the custom color selector to instantly update the viewport as you adjust it, instead of waiting until you close the picker.
- You can now right-click a block, or a Custom Block in the imports panel, and select "Find Uses" to see every place in the notebook where that block is referenced, listed in the outline. Use F3 and Shift+F3 to navigate between the results.